Showing posts with label 2021Favorite. Show all posts

Thursday, December 30, 2021

2021 In Review

I'm sure I'm not alone this time of year when I spend some time reflecting on the year that just passed and thinking about what I want to do moving forward. I do this for all aspects of my life from cooking, to finances, to work, to family, to health, etc. But since this blog is about cooking, I'll just cover that. I'll cover the other stuff on the "other" blog (which I'm going to try to write more on this next year...and maybe more interesting stuff).

My goal this year was 125 new recipes. I started doing this annual goal of "new" recipes when the pandemic hit in 2020. I was home, so why not cook. I have a ridiculously organized recipe index that allows me to select, randomly, recipes each week (maybe some day I'll talk about that process - it's intense). I set the goal of 125 because the previous year was 100 and I cooked 136. I felt like a sales person who hit their quota and therefore increased their next quota. In thinking about this next year, there's a very small chance I will be going back into the office occasionally, but I'll mostly be working at home. I considered not having a goal at all and just track the new recipes and see where I end up, but that's not very fun for me. So, I'm going to shoot for 150 New Recipes next year. 

Now for the nerdy stuff. 

This graph shows the total recipes by month. Clearly something was up in June and that something was that massive heat wave. NO ONE wants to cook when it's that hot. I averaged 14 recipes a month this year. 


I've been tracking my recipes since 2006. In the early days I randomly tried new recipes and "liked" to cook but didn't really focused on recipes. Then one day In 2010 or 2011 I decided to go through all my cookbooks and start a recipe index so I knew what was what. I mean, I had so many cookbooks and was not cooking anything from them. It's very clear by this next graph that the last two years cooking new recipes was a focus. 


I can't say my blog writing about recipes has gotten any better, but I believe this blog is ABOUT the recipe and not all the jibber jabber you find on so many other cooking blogs. Just get to the recipe. My aim is to cover these things: 

  1. Did I like the recipe?
  2. What did I change?
  3. Would I make it again?
And on occasion I throw in a story about anything crazy that happened while I was cooking OR if the recipe pulls a heart string. But mostly, I'm about getting to the recipe. 

Because I have a recipe index (aka recipe data), I can also tell you the categories of recipes I cooked. This graph is not at all surprising to me. Beef and chicken are the two biggest categories of recipes I have, so naturally they are the bulk of new recipes. 


I feel like I cooked more stews than just 5, but maybe some of what I cooked wasn't a new recipe. I think I need to cook more fish for sure next year, maybe less beef. <insert sheepish grin>. I do love my beef though.

So that's the year in review. I find variety is the spice of life and the only way to get variety in my cooking is to continue to try new recipes. As of today I have over 1300 recipes in my index to still try. I will NEVER EVER get through all these. In fact, I add to it all the time and I remove recipes all the time. 

I will be doing a blog of my top 10 favorites, so stay tuned for that. 

Thank you for those who check in regularly and for those who just drop in occasionally. I love hearing from you when you try a new recipe. I hope this blog helps you try new recipes too. 

Happy New Year! 


Monday, December 6, 2021

Creamy Cajun Chicken Pasta with Smoked Sausage (Recipe 155 of 125)

Photo from What's in the pan
This one, my friends, is going into the favorites drawer. Holy smokes was this good. 

I am 100% convinced, however, it has everything to do with the right sausage. I went to Double DD Meats to get their Polish sausage because I believe it's some of the best around. I had the BFF over for dinner and she and I agreed that the sausage was the winner in this meal. In fact, we thought the chicken didn't even need to be there. 

The sauce turned out creamy and flavorful. It had a kick to it because of the cajun seasoning, but that's okay. If you like things less spicy, uses less seasoning. Like maybe just season the chicken with it and not add more later. 

I used Farfalle pasta because that's what was in the pantry. I think any pasta would work fine for this.

Creamy Cajun Chicken Pasta with Smoked Sausage
Recipe from Whatsinthepan.com

Serves 4

  • 3 T butter (unsalted and divided)
  • 1 lb. chicken breasts
  • 6 oz. smoked sausage (sliced into ¼ inch pieces)
  • 8 oz. baby Bella mushrooms (sliced)
  • Cajun seasoning to taste
  • Italian seasoning to taste
  • Salt and pepper (to taste, optional)

Creamy Parmesan Sauce:

  • 4 cloves garlic (minced)
  • 1 c chicken broth (sodium free)
  • 1 T Worcestershire sauce
  • 1 c heavy cream
  • 2 tsp Cajun seasoning
  • 1 tsp Paprika
  • ½ tsp garlic powder
  • ¾ c Parmesan cheese  
  • sea salt (to taste)

Pasta:

  • 8 oz. penne pasta


Boil pasta in salty water according to the package instructions. Drain and set aside.

Chicken, sausage and mushrooms:

Generously season chicken with salt, pepper, Cajun and Italian seasonings. Do not slice it yet - you will be cooking it whole. Slice sausage into ¼ inch circles and slice mushrooms.

In a large skillet, add 1 tablespoon butter and melt it over medium high heat. When the pan is hot, add whole chicken breasts and cook for about 4-5 minutes on each side until browned for a total of 8-10 minutes. Remove chicken onto a plate and slice into strips.

Add sliced sausage pieces and brown them on medium heat for 2-3 minutes on each side until darker in color around the edges. Remove from the skillet onto a plate.

Deglaze the pan with a splash of water and add 2nd tablespoon of butter and sliced mushrooms into the skillet (add more butter as well, if needed). Saute until your mushrooms should look nice and moist, and dark. Once cooked, remove them from the pan as well.

Sauce:

To make the sauce, add remaining 1 tablespoon butter to the pan, allow it to melt and then cook garlic in it until slightly browned – only for a couple of minutes. Next add chicken broth, Worcestershire sauce and heavy cream and bring to a light simmer. Add Cajun seasoning, paprika and garlic powder and mix into the sauce.

Add Parmesan cheese and whisk to blend for 2-3 minutes to thicken the sauce. Taste the sauce and add salt to taste.

Add cooked pasta into the sauce and mix in well. Next add the chicken, sausage and mushrooms back into the pan and allow them to reheat for 2-3 minutes. Close the lid to help the heat stay in. Serve immediately!

Sunday, October 10, 2021

Chicken Adobo with Coconut Milk (Recipe 135 of 125)

Photo from TheKitchn.com
I've had a couple versions of Chicken Adobe, but this one - by far - is my favorite. The flavor in this dish was astounding. It's going into the favorite category for sure. 

I couldn't find drumsticks, oddly, at the store - but I could find wings. So I chose the drumettes and used those. I'll make this again with real drumsticks when I find them. 

I also couldn't find a Fresno chili so used a jalapeno. It might change the flavor slightly with a Freson, but doubt it would be that noticeable. This dish is not spicy, just a little lingering heat with each bite.

Chicken Adobo is a Filipino dish. I've had it a dozen times either by myself cooking it, eating out or friends making it. It feels like in every situation it tastes slightly different. Like each family recipe has a little something different. And I'm ok with that. It makes me want to keep trying it. 

Update: I've been told by my friend Paul that I need add my "other" note that I left out. I may have put in 1/4 c more of the vinegar than the recipe called for. The overall taste was overly vinegar-y so I dumped in about 1/4 c of heavy cream to tone down the vinegar. It made a nice smooth, buttery, sauce. I'd do it again for sure. 

I also couldn't find the Datu Puti vinegar they have in the recipe. Googling substitutions I found rice vinegar was a substitute, so I used that. It may be more vinegar-y than what they suggest. I'm going to go to an Asian market to see if I can find the Datu Puti to try it. 


Chicken Adobo with Coconut Milk (Adobo Sa Gatâ)
Recipe from Thekitchn.com

Serves 4

8 cloves garlic
1 red Fresno chile, or 1/2 teaspoon red pepper flakes
2 pounds bone-in chicken drumsticks and thighs
1/2 c plus 1 T soy sauce, preferably Silver Swan, divided
2 1/2 tsp coarsely ground black pepper, divided
2 T vegetable oil
1/2 c cane vinegar, such as Datu Puti
1/2 c full-fat coconut milk
1/2 c water
2 T raw, coarse sugar, such as demerara
4 bay leaves
Cooked rice, for serving
Thinly sliced scallions, green parts only, for garnish

Coarsely chop 8 garlic cloves. Holding 1 Fresno chile by the stem end, thinly slice the lower half into rounds. Trim, seed, and finely chop the remaining half of the chile. Pat 2 pounds bone-in chicken dry with paper towels. Season with 1 tablespoon of the soy sauce and 1/2 teaspoon of the black pepper.

Heat 2 tablespoons vegetable oil in a small Dutch or heavy-bottomed pot oven over medium-high heat until shimmering. Add the chicken skin-side down and cook until the skin starts to brown and caramelize, about 5 minutes.

Add the garlic, chopped chile or 1/2 teaspoon red pepper flakes, 1/2 cup cane vinegar, 1/2 cup coconut milk, 1/2 cup water, 2 tablespoons raw sugar, 4 bay leaves, remaining 1/2 cup soy sauce, and remaining 2 teaspoons black pepper. Bring to a gentle boil. Reduce the heat to a simmer, partially cover the pot and gently simmer for 35 minutes.

Uncover and flip the chicken so it is skin-side up. Gently simmer uncovered, adjusting the heat as needed, until the chicken is very tender, pulling away from the bone, and the liquid is reduced and starting to thicken slightly, about 25 minutes more. Serve the chicken over cooked rice. Spoon the sauce over the chicken and rice and garnish with the scallions and sliced chiles if using.

Thursday, September 2, 2021

Madeira-Roasted Mushrooms & Shallots (Recipe 119 of 125)

Photo from Eating Well
 Y'all...this recipe! OMG. If you don't like mushrooms, then move on. 

I am a big fan of sautéed mushrooms...in any form. I frequently put a splash of balsamic at the end and I love that. Then this recipe crossed my path. 

Whoa. The flavor of the madeira wine is off the chart good. I didn't, and wouldn't change a thing.

Madeira-Roasted Mushrooms & Shallots
Recipe from Eating Well

Serves 4

  • 1 pound mixed mushrooms, cut into 1-inch pieces
  • 2 c thickly sliced shallots
  • 2 T extra-virgin olive oil
  • Extra Virgin Olive Oil 16.9 Fl Oz
  • 1 T chopped fresh thyme or 1 teaspoon dried
  • ¼ tsp salt
  • ¼ tsp ground pepper
  • ⅓ c Madeira

Place a large rimmed baking sheet on the center rack and preheat oven to 450°F.

Toss mushrooms and shallots in a large bowl with oil, thyme, salt and pepper. Spread on the hot baking sheet. Roast for 15 minutes.

Stir in Madeira and continue roasting until the vegetables are browned and the Madeira has evaporated, about 5 minutes more.


Saturday, July 31, 2021

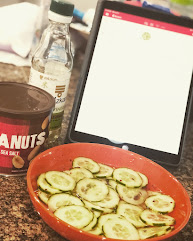
Thai Cucumber Salad (Recipe 98 of 125)

Cucumbers and I have a love hate relationship. I love them, but they do not love me. This recipe, oddly, they did not cause the burp-fest that they normally do. 

This is going to be a repeat recipe for sure. I swapped the sugar with monkfruit sugar - couldn't even tell. Got a little carried away with the red pepper flakes. These cucs were on FIRE. 

I let the cucumbers marinade in the vinegar mixture for 4 hours. Right before serving I added the chopped peanuts. 

Make this recipe. You won't regret it. 

Thai Cucumber Salad
Recipe from Get in My Belly
Serves 6

⅓ c rice vinegar
2 T granulated sugar
½ tsp toasted sesame oil
¼ to ½ tsp red pepper flakes
½ tsp salt
2 large cucumbers
3 green onions
¼ c chopped peanuts

In a small bowl, combine the rice vinegar, sugar, sesame oil, red pepper flakes, and salt. Set the dressing aside to give it time to blend.

Peel and slice the cucumber using your favorite method (see photos below for my technique). Place the sliced cucumbers in a large bowl.

Chop the peanuts into smaller pieces, if desired. Slice the green onions.

Add the dressing, peanuts, and green onions to the sliced cucumbers. Stir to combine. Serve immediately or refrigerate until ready to eat. Give the salad a brief stir before serving to redistribute the dressing and flavors.

Thursday, July 15, 2021

Bisteces a La Mexicana (Mexican Style Beef Stew) (Recipe 92 of 125)

I got a question from a friend about how I could make so much food with such large servings. Let me explain that I cut almost every recipe in half. I rarely make the recipe for the full number of servings. I am just one person and usually cutting it in half allows for a meal for me and one to put in the freezer for the Pantry Goat.

This recipe was FAN FREAKIN TASTIC. Her original recipe cooked for 8 - so even cutting it in half I still had quite a bit left. It'll be a recipe I'll heat up for lunch for sure. The leftover is going to be even better. 

The ONLY change I made is I felt like it needed a bit more flavor so I replaced the cumin with chili powder. I'm not a huge fan of cumin so this swap made sense to me. It obviously changes the flavor, but either way it was yummy!


Bisteces a La Mexicana (Mexican Style Beef Stew)
Recipe from SkinnyTaste
Serves 4

1 pounds top sirloin, diced into 3/4 inch cubes
1 tsp kosher salt
1/2 T olive oil
1/2 large white onion, sliced 1/4 inch thick sliced, halved (2 cups)
2 jalapenos, stemmed and sliced (remove seeds for mild, leave in for spicy)
1/2 tsp dried oregano
1/2 tsp ground cumin
1 can petite diced tomatoes and their juices
1/4 c cilantro, chopped

Optional for serving:
warm soft corn tortillas
cooked rice
pickled jalapenos

Season the beef with salt and let it sit 1 hour.

In a large cast iron pan or Dutch oven, heat the oil over high heat. When hot add the meat and cook, stirring 4 to 5 minutes.

Add the onion, jalapeno, oregano, and cumin, and cook, stirring occasionally until the vegetables are tender, 10 minutes.

Reduce heat to low, add the tomatoes and cook, covered stirring every 5 minutes to prevent sticking, until the meat is tender, about 45 minutes. Add the cilantro.

Divide the meat and serve family style with warm tortillas, rice and pickled jalapeno on the side, if desired.


Thursday, April 29, 2021

Basic Bulgogi (Recipe 65 of 125)

Tonight was another fun virtual dinner with my pals from Bellingham, Paul and Suzanna. If you're playing along, Paul and I share a favorite recipe with each other and we cook it. Then we hop on Facetime and we chat about everything and anything...and sometimes the meal. 

Paul gave me something I've never made before, Basic Bulgogi. If you don't know what bulgogi is, it's a Korean dish. I googled it to be sure. Pronounced "bull-GOH-ghee. It comes from bul (fire) and gogi (meat). It's marinated grilled beef (generally using higher end beef for better marbling). It's prepared in a sweet and savory sauce made of soy sauce, sugar and Korean pear juice, then grilled on a barbecue or stove top griddle.

This recipe used pork instead, and it was definitely on fire. I used the tsp of red pepper flakes and WHOA...cleared my sinuses. 

This will be a rerun recipe for me. It was flavorful and so very delicious. I want to try this recipe with beef and I think it'll be extra delicious with chicken. I let mine marinade for 4 hours or so. This recipe doesn't have a strong acid in it so I'd go for more next time. 

I kept about a 1/4 c of the sauce out of the marinade and used it in the end to toss the little pieces of pork goodness in it. Then boiled it down a bit ... so good. 

Basic Bulgogi
Recipe from Bon Appetit

Serves 4

¼ pear, grated
1 garlic clove, grated
2 T soy sauce
1 T gochugaru (coarse Korean hot pepper flakes), or 1 teaspoon crushed red pepper flakes
1 T grated peeled ginger
1 T light brown sugar
1 T toasted sesame oil
1 pound boneless pork loin, trimmed hanger steak, boneless short rib, or skinless, boneless chicken breasts or thighs
2 T vegetable oil, divided
Kosher salt
Sliced scallions (for serving)

Combine pear, garlic, soy sauce, gochugaru, ginger, sugar, and sesame oil in a large resealable plastic bag or medium bowl. Using a sharp knife, slice meat into very thin strips. Add to marinade, seal bag, and squish everything around until the meat is coated. Let sit at room temperature 30 minutes, or chill up to 8 hours.

Heat 1 Tbsp. vegetable oil in a large skillet over medium-high until oil is shimmering. Remove half of meat from marinade, letting excess drip back into bag; season lightly with salt and cook in a single layer without moving until lightly browned, about 1 minute. Toss meat and continue to cook, tossing occasionally, until cooked through and crisp at edges, about 3 minutes. Transfer to a plate. Repeat with remaining 1 Tbsp. vegetable oil, remaining meat, and more salt.

Serve topped with scallions.

Thursday, April 22, 2021

Copycat Cafe Rio Steak Marinade (Recipe 59 of 125)

Photo from Six Sisters Stuff
Winner! Winner! Beef dinner!!

This marinade really hit the spot. Simple, easy ingredients and turns out a fantastic flavor. 

I cut the steak into chunks to marinade them. My theory is there's more surface to take on that marinade then. With this marinade I'm glad I did. 

Make this marinade. You won't be disappointed. In fact, I think I'm going to try it on chicken!

Copycat Cafe Rio Steak Marinade
Recipe from Sixsistersstuff.com

Serves 4

  • 1/4 c raw honey
  • 1/4 c low sodium soy sauce
  • 1/8 c lemon juice
  • 1/2 tsp ground ginger
  • 1 tsp minced garlic
  • 1 1/2 pounds steak (sliced about 1/2 inch thick)

In a medium tupperware container or re-sealable bag, whisk together your honey, soy sauce, lemon juice, ginger and garlic.

Add in your steak, and mix until coated.

Marinade for at least 30 minutes (sometimes I'll even let it sit overnight for great flavor).

Grill over medium heat until steak pieces reach desired doneness.

Monday, February 22, 2021

Sunny's Easy Beefy Texas Chili (Recipe 29 of 125)

Chili is one of those recipes for me that has two things required: 1) beans and 2) Fritos. The only time mom made chili was for Frito Lollies. But chili is a hearty, warm, comfort food that I really do enjoy.

Photo from Food Network
Last night I made a recipe I've had my hands on since 2006ish. It's a chili from a Food Network personality Sunny Anderson. As I read the recipe I was immediately struck with two things: 
  1. No Beans
  2. And use Pumpkin Pie Spice as an ingredient in chili?
Chili without beans leaves me very confused. And I've never EVER used pumpkin pie spice in a chili. Ever. I was sure it was going to be odd, but it turned out to add a nice warming flavor to it.

Bottom line, this was tasty. I'll add it to my favorite list and most likely will add a can of beans next time. 

Sunny's Easy Beefy Texas Chili
Recipe from Sunny Anderson

Serves: 6

Spice mix: 
  • 1 T ground cumin
  • 1 T ancho chile powder
  • 2 tsp dry Mexican oregano
  • 1 tsp pumpkin pie spice
  • Kosher salt and freshly ground black pepper
Chili Makings
  • 3 T olive oil
  • 1 pound chuck beef or stewing beef, cut into 1-inch cubes
  • 1 c finely chopped onion
  • 1 c chopped red bell pepper
  • 3 T tomato paste
  • 2 T hot sauce, such as Frank's
  • 3 cloves garlic, grated on a rasp grater or finely minced
  • 1 pound ground chuck (80/20)
  • 1 1/2 c beef stock
  • 1 1/2 c red wine (any cheap Chianti will do) or lager beer [JW Note: I used wine just out of curiosity on how it would taste and it was surprisingly good]
  • 2 T fine cornmeal
  • Sliced scallions, shredded yellow Cheddar and tortilla chips, for serving

In a small bowl, mix the cumin, chile powder, oregano, pumpkin pie spice, 2 teaspoons salt and a few grinds of black pepper.

In a large pot over medium heat, add the olive oil, beef cubes and half of the seasoning blend. Cook until the beef is browned on all sides but not cooked through, 5 to 7 minutes; remove with a slotted spoon to a plate. Add the onion, bell pepper, tomato paste, hot sauce, garlic and a pinch of salt to the pot. Cook, stirring, until everything turns a dark reddish brown, about 8 minutes.

Add the ground beef and sprinkle over the remaining seasoning blend. Cook, stirring, until the beef is no longer pink, 5 to 7 minutes. Add the reserved beef chunks back to the pot along with the stock, wine or beer and cornmeal. Bring to a boil, then lower to a simmer and cook, partially covered and stirring occasionally, until the chili is thick and the liquid is reduced, 40 to 45 minutes.

Spoon the chili into bowls and serve with sliced scallions, shredded cheese and tortilla chips.

Thursday, February 11, 2021

Quick Chicken Marsala (Recipe 24 of 125)

MMMM chicken marsala. Among my favorite combination of flavors. I rarely order it out though, but love to make it at home. I have several recipes for it that I've tried in the past. All of them, including this one, are basically the same. 

I only made one modification to this recipe, and I'm not really sure why. I added about 2T of heavy cream to the sauce when it was done. It doesn't need it, I just added it because I thought it would make it a bit more rich. And it did. If you don't do that, you won't miss out. 

Quick Chicken Marsala
Recipe from Cooking Light

Serves 4

  • 2 T olive oil, divided
  • 4 (4-oz.) skinless, boneless chicken breast cutlets
  • 3/4 tsp black pepper, divided
  • 1/2 tsp kosher salt, divided
  • 1 (8-oz.) pkg. presliced button mushrooms
  • 4 thyme sprigs
  • 1 T all-purpose flour
  • 2/3 c unsalted chicken stock
  • 2/3 c Marsala wine
  • 2 1/2 T unsalted butter
  • 1 T chopped fresh thyme (optional)

Heat 1 tablespoon oil in a large nonstick skillet over medium-high. Sprinkle chicken with 1/2 teaspoon pepper and 1/4 teaspoon salt. Add chicken to pan; cook until done, about 4 minutes per side. Remove chicken from pan (do not wipe out pan).

Add remaining 1 tablespoon oil to pan. Add mushrooms and thyme sprigs; cook, stirring occasionally, until mushrooms are browned, about 6 minutes. Sprinkle flour over mixture; cook, stirring constantly, 1 minute.

Add stock and wine to pan; bring to a boil. Cook until slightly thickened, 2 to 3 minutes. Remove pan from heat. Stir in butter, remaining 1/4 teaspoon pepper, and remaining 1/4 teaspoon salt. Add chicken to pan, turning to coat. Discard thyme sprigs before serving. Sprinkle with chopped thyme, if desired.

Thursday, February 4, 2021

Pork and Chinese Cabbage Filling

For our company's holiday party we did virtual cooking class with Tom Douglas. You can read more about it here. I counted the cucumber salad as a new recipe because it was the one thing we did have to make. The rest had the ingredients already put together for us, mostly. All we had to do for the dumplings is put the filling in, fold them and cook them. 

I know this looks like a long set of instructions, but I assure you it's pretty easy to do. If I can do them, anyone can. The folding can be a bit tricky. I didn't see how he did it so I made up my own fold. After the class I found this YouTube video that helps explain folding

These were so gosh, darn, dang delicious! The best part of them though might be the dipping sauce. That's all the way at the bottom of this blog, don't miss it. You'll want to drink it I swear.  I burnt the first round because I lost focus. The second round turned out just fine. The burnt ones were delicious despite the crispier outside.

Pork and Chinese Cabbage Filling
Recipe Hsiao-Ching Chou, Chinese Soul Food

Makes about 1 ¼ pound filling, enough for 45-50 dumplings

  • 1 pound ground pork
  • 2 ½ cups, loosely packed, finely chopped Chinese cabbage
  • 2 tablespoons soy sauce
  • 1 stalk green onions, finely chopped
  • 1 teaspoon minced ginger
  • 1 teaspoon sesame oil
  • ¼ teaspoon ground white pepper, optional

In a medium bowl, combine the pork, cabbage, soy sauce, onions, ginger, oil and pepper, and mix well. Set the filling aside.

Folding Dumplings

The simplest way to seal a dumpling is to fold the wrapper over the filling into a half-moon shape. Match the edges together and press as if you were sealing an envelope. There is no need to dab homemade wrappers with water. There is enough moisture in the dough that the edges will seal when pressed. Holding the sealed edge of the dumpling between your fingers, set it on its spine and gently wiggle it as you are pushing down so that the dumpling will stand up. Place the completed dumpling on a baking sheet dusted with flour or lined with parchment paper. Repeat with the remaining dumplings.

Storing Dumplings

Once you have made all the dumplings, you can cook them immediately or freeze them. If you freeze them, place the baking sheet of dumplings in the freezer for about 30 minutes to harden enough so they don’t stick together. Then, transfer the dumplings to a Ziplock bag and place them in the freezer to store for up to two or three weeks. You can cook them from frozen. Do not defrost or you will get a gooey mess. If you are cooking the dumplings immediately, proceed to any of the following cooking methods.

To Steam Dumplings

Set up the steamer. Line a steamer basket with steamer paper or perforated parchment paper, and place the prepared dumplings in a single layer in the basket, leaving about 1 inch between dumplings. Place the steamer basket on top of the pot, and steam, covered, for 8 to 10 minutes, or until the wrappers puff up. The cooking time will depend on the filling; meat fillings take longer. If you are cooking frozen dumplings, steam them for 1 to 2 minutes more.

To Panfry Dumplings (Pot Stickers)

Preheat an 8- or 9-inch nonstick skillet over medium heat for about 1 minute. (If you have a bigger or smaller skillet, that’s fine. Adjust the oil amount as needed.) Avoid high heat, which can cause the nonstick coating to deteriorate. Add enough vegetable oil to generously coat the entire surface of the pan and create a slight pool of oil (about 1/8 inch deep). This may seem like a lot of oil, but it will help you create that telltale crispy pot sticker crust.

Carefully arrange the dumplings in a single layer in the skillet, at side down. Add ½ cup water to the skillet and cover immediately. Cook for 7 to 9 minutes, or until the water has evaporated and the bottoms of the dumplings have reached a golden brown. The cooking time may vary slightly depending on your stove. Frozen dumplings may need 1 minute more to cook. Adjust the heat as needed.

If you have leftover dumplings, store them in the refrigerator and eat within a couple of days. To reheat, place them in a lightly oiled pan over medium-low heat and let the filling come to temperature. This will refresh the crispiness of the crust. Or you can eat them cold, as I sometimes do.

SOY-GINGER DIPPING SAUCE

MAKES ABOUT ½ CUP

  • 1/3 cup soy sauce
  • 2 tablespoons unseasoned rice vinegar
  • 1 stalk green onion, finely chopped
  • 2 large cloves garlic, finely chopped or crushed
  • 1 tablespoon chopped fresh cilantro
  • 1 teaspoon minced fresh ginger
  • 1 teaspoon chili sauce (optional)

In a small bowl, combine the soy sauce, vinegar, onions, garlic, cilantro, ginger, and chili sauce. Set aside on the counter for at least 30 minutes, if possible, to let the flavors meld together. The longer the mixture rests, the more intense the flavor becomes. You can store the dipping sauce in a sealed container in the refrigerator for up to 1 week.

Smacked Cucumber Salad - Virtual Cooking Class (Recipe 23 of 125)

Today we had our company holiday party...I know it's past the holidays. We moved it because it was, well, easier to do it later...you know how December gets crazy. Anyhow, today was a virtual cooking class with Tom Douglas. If you don't know who he is, he's a Seattle chef who has a metric crap ton of restaurants

Ahead of today's class we received a box of goodies that had all the ingredients we'd need for today. Some were already put together for us some were not. The theme of today's class... DUMPLINGS!! aka Potstickers. The recipe for the dumplings is here.

I'll put all the recipes below but am only counting one as a new recipe. The cucumber salad recipe we did actually have to make ourselves and since two out of the three containers that came for this recipe burst in the package, I had to actually measure out the ingredients. Thank heavens I had them. 

This recipe was delicious. I love cucumbers, they just don't love me. I burp just thinking about them. The flavor of this recipe was dead on. I'm going to make it again for Saturday with the niece and family dinner. 

I didn't "smash" my cucumber. I just couldn't. My OCD self just couldn't do it. So I did what Tom suggested I cut it in half lengthwise, then quartered the halves, then sliced them on a diagonal. We made it first and then let it sit for 30 minutes or so. I couldn't eat it all because of how many dumplings I ate... so I tossed them in the fridge. They'll make a great breakfast.

Smacked Cucumber Salad
Recipe from Hsiao-Ching Chou (she a chef who works with Tom and he gushed about her the whole time - so she is all that and a slice of bread)

Serves 4

2-3 English cucumbers, skins on
1 T soy sauce
1/2 T balsamic vinegar
1/2 tsp sugar
2 cloves garlic, crushed
Pinch of pepper flakes

Trim the ends off the cucumber. Starting at one end of the cucumber, place the flat of your knife on top of the cucumber. Gently but firmly strike the blade with the heel of your palm to smash the cucumber into pieces. (I have to admit I had images of Gallagher with this). Repeat this for the rest of the cucumbers. If there are any large sections, you can cut through them. 

Put the smashed cucumbers in a medium bowl. Add the soy sauce, vinegar, sugar, garlic and red pepper flakes, and mix well. Cover and let the cucumbers marinate on the counter for at least thirty minutes before serving. Store the cucumber in the refrigerator, covered, for up to three days. 

Monday, February 1, 2021

Brown Sugar Bourbon Steak Tips (Recipe 21 of 125)

Y'all...its rare that  recipe makes me speechless. This recipe...oh man...I'm almost drooling just thinking about how good this recipe was. It IS a keeper for sure and WILL be in the rotation for Sunday dinner (when/if we ever get to do Sunday dinner again). 

You must make this. The flavor was amazing...and you could taste the bourbon...you've been warned. 

When I make it again, I might spend a little more on a higher quality bourbon. I bought Jim Beam - which is good, but not great. Now that I know how much the bourbon flavor stands out...it'd be worth a nicer quality bourbon. 

I marinated the steak tips for 6 hours. And then grilled them to a perfect medium rare to medium. I COMPLETELY forgot to put the onion in...I was so blown over by the flavor of the marinade I think I blacked out. 

Brown Sugar Bourbon Steak Tips
Recipe from Newengland.com

Serves 4

  • 1/2 c bourbon
  • 1/2 c brown sugar
  • 1 tsp Worcestershire sauce
  • 1/4 c soy sauce
  • 1 medium-size yellow onion, cut crosswise into 1/4-inch-thick rings
  • 2 pounds sirloin steak tips or flank steak
  • Kosher or sea salt
  • Freshly ground black pepper

In a medium-size bowl, whisk together bourbon, brown sugar, Worcestershire, and soy sauce. Pour into a large zip-top bag; add onion and steak.

Seal, squeezing to expel any air, and let meat marinate for 2 hours.

When ready to cook, drain and season meat with salt and pepper.

Set up your grill for direct high heat. To grill meat, sear on one side until nicely browned, 4—6 minutes. Turn meat and grill until it reaches desired doneness (4—6 minutes more for medium rare).

Cook onions in a grill pan, stirring occasionally, until golden, about 10 minutes. Or cook onions directly on grill grates away from direct heat, carefully turning once, for 8—10 minutes total cooking time.

Wednesday, January 13, 2021

Parmesan Chicken and Rice (Recipe 11 of 125)

This recipe gets 5 stars from me for so many reasons. 

First, its easy. Nothing fancy about it and, in fact, lists shortcuts for your prep time (bottled garlic, pre-sliced mushrooms)

Then there's the flavor! I had pretty low expectations for some reason and was blown away. That last hit of Parmesan really brings it all together. The nutty-ness of the Parmesan with the sautéed mushrooms really hit the right flavor profile for me tonight. 

I followed this recipe almost exactly. I cooked the mushrooms first for a lot longer than 5 minutes. I like a nice brown on my mushrooms. Then I tossed in the onions until they were soft, and then the chicken. The rest I followed exactly. 

Parmesan Chicken and Rice
Recipe from MyRecipes.com
Serves 4
  • 1 T olive oil
  • 1/2 c chopped onion
  • 1 tsp bottled minced garlic
  • 1/2 tsp dried thyme
  • 1 (8-ounce) package pre-sliced mushrooms
  • 3/4 pound skinless, boneless chicken breast, cut into bite-sized pieces
  • 1/2 c dry white wine
  • 1/2 tsp salt
  • 1/4 tsp freshly ground black pepper
  • 1 c uncooked instant rice
  • 1 c fat-free, less-sodium chicken broth
  • 1/2 c grated fresh Parmesan cheese
  • 1/4 c chopped fresh parsley

Heat oil in a large nonstick skillet over medium-high heat. Add the onion, garlic, thyme, and mushrooms; sauté 5 minutes or until onion is tender. Add chicken; sauté 4 minutes or until the chicken is lightly browned. Add wine, salt, and pepper; cook 3 minutes or until liquid almost evaporates.

Stir in rice and broth. Bring to a boil; cover, reduce heat, and simmer 5 minutes or until liquid is absorbed. Stir in cheese and parsley.

Friday, January 8, 2021

Mom’s Sizzlin’ Steak Marinade (Recipe 7 of 125)

One of my all time favorite, and go to, steak marinades is the Better Than A1 marinade. THIS marinade is BETTER than the Better Than A1 marinade. I know! I can't believe it either. 

This marinade will be on rotation and will be one of my all time favorites. 

I made just one modification. The recipe calls for 1.5 cups of vegetable oil. That seems like a lot of vegetable oil. I used 1/2 c and it was fine. 

Oh, I guess the other change I made is I used a flank steak instead of 6 small steaks. Honestly ANY beef cut would be great with this recipe. 

I also only marinated this for 3 hours because I didn't plan ahead and allow for a full 24 hours to marinade it. I felt like there was a ton of flavor from that 3 hours. 24 hours may be overkill with the acid in the marinade, but that may be just me. I think it makes beef mushy when you marinade it too long. 

Mom’s Sizzlin’ Steak Marinade
Recipe from Sixsistersstuff.com

Serves 6

  • 1 1/2 c vegetable oil [JWnote: I used just 1/2 c]
  • 1/4 c Worcestershire sauce
  • 1 tsp ground pepper
  • 1/2 c apple cider vinegar
  • 3/4 c soy sauce
  • 2 T dry ground mustard
  • 1/3 c lemon juice
  • 6 small steaks JWnote: I used a flank steak]

Photo from SixSistersStuff
Mix together vegetable oil, Worcestershire sauce, pepper, apple cider vinegar, soy sauce, dry mustard, and lemon juice in a Ziploc bag or an airtight container (like tupperware or rubbermaid).

Add 3 pounds of steak (about 6) to the marinade (any cut of steak will work).

Store in fridge to marinate for about 8 hours. Flip over the steaks halfway through marinating.

Grill over medium-high heat to your liking

Saturday, January 2, 2021

Steak Tips with Peppered Mushroom Gravy (Recipe 1 of 125)

Here we go. The start of 2021! My recipe goal is 125 recipes this year. I did 134 last year (2020) so there's a good chance I'll hit this goal. Rules are the same. No limitations on what a "new" recipe has to be. It can be a protein shake, cookies, dinner, vegetable, etc. If I've not made it ever, it's considered new. 

I got my act together tonight and cooked up this delicious steak tips recipe. I love steak tips. When I've had them in restaurants there's something about how simple they are and yet are often so delicious. 

I'm not sure where the "peppered" part of this comes into play. The recipe only calls for 1/2 tsp of pepper and that, to me, is just normal pepper. I was expecting a more pepper-y flavor. I tasted more soy sauce than I did pepper. 

Regardless, this will be flagged as a favorite. I didn't make the egg noodles with it. Instead I put it over rice. 

Steak Tips with Peppered Mushroom Gravy
Recipe from My Recipes

  • 2 c uncooked egg noodles
  • Cooking spray
  • 1 pound top sirloin steak, cut into 3/4-inch pieces
  • 1 T butter
  • 2 T finely chopped shallots
  • 1 (8-ounce) package presliced baby bella mushrooms
  • 1 tsp minced garlic
  • 1 T lower-sodium soy sauce
  • 3 T all-purpose flour
  • 1 1/2 c fat-free, lower-sodium beef broth
  • 1/2 tsp black pepper
  • 1/4 tsp salt
  • 3 fresh thyme sprigs
  • 1 tsp fresh thyme leaves (optional)

Cook noodles according to package directions, omitting salt and fat; drain.

While noodles cook, heat a large nonstick skillet over medium-high heat. Coat pan with cooking spray. Add steak; sauté 5 minutes, browning on all sides. Remove from pan; cover.

Melt butter in pan over medium-high heat. Add shallots and mushrooms; sauté 4 minutes. Add garlic; sauté 30 seconds. Stir in soy sauce. Sprinkle flour over mushroom mixture; cook 1 minute, stirring constantly. Gradually add broth, stirring constantly. 

Add pepper, salt, and thyme sprigs. Bring to a boil; cook 2 minutes or until thickened. Return beef to pan; cook 1 minute or until thoroughly heated. Discard thyme sprigs.

Garnish with thyme leaves, if desired.