Showing posts with label favorite. Show all posts

Saturday, April 4, 2026

Beef Curry Slow Cooker

Photo from
The Food Charlatan
Curry tends to be one of those “you’re either in or you’re out” flavors. It’s bold, rich, and unapologetically itself—and personally, I’m all in. So when I saw a recipe featuring both yellow curry and garam masala, I knew it had my name written all over it.

This dish delivered exactly what I hoped for: deep, warm flavor with just enough spice to wake up your taste buds without sending you running for a glass of milk. It’s the kind of heat that builds gently and keeps you coming back for another bite.

What really makes this recipe shine, though, is the slow cooker. There’s something magical about letting those spices simmer all day—the aroma alone turns your house into the coziest place on earth. By dinnertime, the anticipation is almost unbearable (in the best way).

Now, let’s talk about the age-old debate: to brown or not to brown your meat before it hits the slow cooker. Traditional chefs will insist it’s a must, while plenty of TikTok cooks say it’s skippable. Honestly? I fall somewhere in the middle. I’ve done it both ways and can’t say I notice a huge difference—it usually comes down to time and motivation.

This time, I went for it. I browned the meat, followed the recipe exactly (a rare moment of discipline for me), and let the slow cooker do its thing.

The verdict? Absolutely worth making—if you’re a curry fan. And if you’re not…well, we might need to have a conversation.


Beef Curry Slow Cooker
Recipe from The Food Charlatan
Serves 6
  • salt and pepper
  • 2-3 tablespoons oil
  • 2-3 pounds chopped stew beef or chuck roast*, chopped into chunks
  • 1/3 cup water
  • 1 (8-oz) can tomato sauce
  • 1 tablespoon garlic powder
  • 1/2 teaspoon salt
  • 1-2 tablespoons Better Than Bouillon Beef Base
  • 1/2 teaspoon black pepper
  • 1 & 1/2 tablespoons yellow curry powder
  • 1 tablespoon garam masala
  • 1 large yellow onion, chopped
  • cilantro, to garnish
  • red onion, chopped, to garnish
Heat a large, high-sided skillet (or a wide-bottomed pot), over medium high heat.

Salt and pepper the beef chunks.

Add about a tablespoon of oil to the pan and swirl. It should start to shimmer if the pan is hot enough.

Add 1/3 of the seasoned meat to the pan. Place the pieces of meat so that they are not touching each other (You don’t want them to steam–see photos). Turn the pieces with tongs to brown all sides. Remove the beef to the slow cooker and repeat 2 more batches, adding more oil as necessary.

Once all of the beef is browned and in the slow cooker, turn the heat on the pan down to medium. Add the water, tomato sauce, garlic powder, salt, beef bouillon, black pepper, curry powder , and garam masala .

Stir with a wooden spoon until the mixture is bubbly and the bouillon has dissolved. It should thicken up a bit.

Pour the mixture over the beef in the slow cooker.

Add the chopped onion and stir it all together. Cook on low heat for 6-7 hours, until the beef is fork tender

Garnish with chopped cilantro and hot rice!

I love to serve this curry with lots of cilantro, Coconut Jasmine Rice and Homemade Naan! It's the best combo! You could even throw in a Strawberry Lassi to sip with it, if you wanted to get really fancy!

Monday, December 22, 2025

Apple Nachos

This was THE BEST snack ever. I saw this on instagram and knew I had to make it. I'm a bit laid up at the moment and can't drive, but Amazon Fresh will deliver anything. I made a quick order and had this by the time for a snack in the afternoon. 

It's super easy and is so delicious. 

I used granny smith apples and I only did a half. One whole apple might have been too much for a snack. 


Apple Nachos
Instagram

1 Apple, sliced thin
1 T peanut butter; melted
1 tsp mini chocolate chips

Melt the peanut butter a little in the microwave. 
Arrange the apple slices, drizzle the peanut butter and then sprinkle with chocolate chips. 

Tuesday, December 2, 2025

Firehouse Green Beans with Bacon

I love canned green beans. I can't explain why, and I'm not even going to bother trying. I don't, often, eat the French cut green beans. I find them too stringy sometimes. ahem. 

At any rate, this recipe seemed super simple and bumps up the green beans a little for a side dish. 

Photo from Julie Blanner blog

Turns out this was fantastic. I'd make it again in a heart beat. Though, if I'm being honest, I'd use cut green beans. They're my favorite. 

Firehouse Green Beans with Bacon
Recipe from Julieblanner.com
Serves 4
  • 3 tablespoons butter salted or unsalted
  • 1 tablespoon minced garlic
  • ½ shallot minced
  • 2 ounces bacon 1/2 pkg real bacon pieces
  • 29 ounce green beans 2 cans French cut, strained
  • ½ cup parmesan grated

On medium low heat, add butter, garlic, shallot and bacon to pan. Cook for 5 minutes, stirring occasionally.

Add green beans, increase heat to medium, stirring frequently until hot.

Garnish with parmesan and serve.

Serve the beans immediately.

Thursday, August 28, 2025

Chesapeake Cheddar Burgers

Y'all know I love a good burger. They're like the story of kissing a lot of frogs to find your prince. I,
too, think you gotta each a lot of burgers to find the good ones. And tonight I found a good one.

It never would have crossed my mind to add Old Bay to burger meat or mayo for flavoring. It's amazing. 

But what made this meal was the tomato. The box came with a tiny, hard, roma tomato. BUT last night my sister-in-law gave me home grown heirloom tomatoes. I cut one of those up and boy did that taste good on this burger. 

I also decided to not cook the potatoes (it's too hot to turn on the oven) and just ate the rest of the tomato. So good. I wish all tomatoes tasted as good as fresh off the vine tomatoes.

Every time I eat a delicious tomato I think of my dad and his LOVE for tomatoes. The stories our family has about his tomatoes could fill a novel size book.

And finally, you know I didn't fry the burgers. 

Chesapeake Cheddar Burgers

Recipe from Hello Fresh

Serves 2

  • 12 ounce potatoes
  • 1 tomato
  • 4 T Mayonnaise
  • 2 tsp Dijon Mustard
  • 1 teaspoon Garlic Powder
  • 1 T Old Bay Seasoning
  • 10 ounces Ground Beef
  • 10 ounce Worcestershire Sauce
  • 2 slice Sliced Mild Cheddar Cheese
  • 2 Brioche Buns
  • 1 Corn on the Cob

 Adjust rack to middle position and preheat oven to 425 degrees.

Cut potatoes into 1⁄2-inch-thick wedges. Toss on a baking sheet with a large drizzle of oil, salt, and pepper.  Roast on middle rack until brown and tender, 20-25 minutes.

Meanwhile, thinly slice tomato into rounds.

In a small bowl, combine mayonnaise, mustard, 1 tsp water, 1⁄2 tsp garlic powder, and 1⁄2 tsp Old Bay Seasoning. Set aside until ready to serve.

In a large bowl, combine beef, 1⁄2 tsp Old Bay Seasoning, and 1⁄4 tsp Worcestershire sauce. Form beef mixture into two patties, each slightly wider than a burger bun. Season lightly with pepper.

Heat a drizzle of oil in a large pan over medium heat. Add patties and cook until browned and cooked to desired doneness, 3-5 minutes per side.  In the last 1-2 minutes of cooking, top each patty with cheddar; cover pan until cheese melts.

While burgers cook, wrap corn in damp paper towels. Microwave until kernels are tender and corn is cooked through, 3-4 minutes. Allow to rest for 1 minute, then evenly halve corn crosswise.

Halve and toast buns until golden.  Spread a thin layer of Old Bay aioli on cut sides of bottom buns. Top with patties, tomato slices, and top buns.

Tuesday, August 12, 2025

Street Cart-Style Chicken Bowls

Oh boy...I don't even know where to start with this meal. First, its entirely too hot here in Seattle. 89F
outside right now and for us, that's hot. I almost decided to not cook because it was too hot. But boy am I glad I did. This dish was amazing. 

I sorta followed the recipe. The one and only change I made is I swapped our dark meat chicken for chicken breast. 

And then when I served myself a plate I decided I wanted some hummus with it. Such a good combination. 

This one is a keeper for sure.


Street Cart-Style Chicken Bowls
Recipe from Hello Fresh
Serves 2

  • 1 tsp Turmeric
  • ¾ cup Jasmine Rice
  • 11/4 c chicken stock
  • 2 Scallions
  • 1 Lemon
  • 1 Tomato
  • 1.5 tablespoons Sour Cream
  • 2 tablespoon Mayonnaise
  • 1 tsp Garlic Powder
  • 10 ounce Diced Skinless Chicken (dark or breast meat)
  • 1 tablespoon Shawarma Spice Blend
  • 2 Pitas
  • 1 tsp Chalula hot sauce

In a small pot, melt 1 TBSP butter over medium heat. Stir in 1⁄4 tsp turmeric (1⁄2 tsp for 4 servings); cook, stirring frequently, until fragrant, 30-60 seconds. • Stir in rice, 1 1⁄4 cups water (2 1⁄4 cups for 4), stock concentrate, a big pinch of salt, and pepper. Bring to a boil, then cover and reduce to a low simmer. Cook until rice is tender, 15-18 minutes. • Keep covered off heat until ready to serve.

Meanwhile, bring 2 TBSP butter(4 TBSP for 4 servings) to room temperature. Wash and dry produce. • Quarter lemon. Trim and thinly slice scallions, separating whites from greens. Dice tomato into 1⁄2-inch pieces.

In a small bowl, combine sour cream, mayonnaise, garlic powder, and a squeeze of lemon. Add water 1 tsp at a time until mixture reaches a drizzling consistency. Season with salt and pepper.

Open package of dark meat chicken and drain off any excess liquid; season with Shawarma Spice Blend, salt, and pepper. • Heat a drizzle of oil in a large pan over medium-high heat. Add chicken and scallion whites; cook, stirring occasionally, until chicken is browned and cooked through, 4-6 minutes.

Toast pitas until softened and warmed through. • Spread with softened butter, then cut each pita into quarters.

Once rice is done, fluff with a fork; stir in half the scallion greens. Season with salt and pepper to taste. • Divide rice between bowls. Top with chicken and tomato in separate sections; season tomato with a pinch of salt. Drizzle everything with as much white sauce and Cholula hot sauce as you like; garnish with remaining scallion greens. Serve with pita and remaining lemon wedges on the side. TIP: We like to scoop up some of the rice, chicken, tomato, and sauces with a pita wedge and eat it all in one bite!

Sunday, August 3, 2025

Chile Colorado

It's Sunday and a little chilly outside for August. Luckily my random recipe selection brought up Chili Colorado which is perfect for a cooler day. 

Now I've made my fair share of chili colorado. Some have been good, some great and some not so great. 

Y'all I think I no longer have to try any other recipe. THIS is the one. It was so amazing. So perfectly balanced. So everything.

This recipe starts with getting your chilis ready. These will ultimately make the sauce that hugs the beef and makes Chili Colorado - well, Chili Colorado. 

The recipe calls for ancho, New Mexico chiles and arbol chiles. You can substitute the ancho with guajillo or pasilla chiles. The New Mexico and arbol chiles really have their own flavor to me so I wouldn't substitute those if you don't have to. 

I had pasilla chilies and decided to use those instead of the ancho.

I wouldn't change a thing with this recipe.


Chile Colorado
Recipe from Hola Jalapeno
Serves 6
  • 6 dried ancho chiles
  • 3 dried New Mexico chiles
  • 2 dried arbol chiles
  • 8 cups beef broth
  • 1 medium white onion, divided
  • 4 garlic cloves
  • 1 1/2 teaspoons ground cumin
  • 1 teaspoon dried Mexican oregano or Mediterranean oregano
  • 2 pounds beef stew meat or cubed chuck roast
  • 2 teaspoons kosher salt
  • 1/2 teaspoon ground black pepper
  • 2 tablespoons avocado oil
  • 2 bay leaves

Remove the stems and seeds from the dried chiles and rinse.

Bring 3 cups of the beef broth to a boil in a large saucepan over medium-high heat. Add the chiles and push down under the broth. Cover and remove from heat. Let sit until soft and pliable, about 30 minutes.

Pour chiles and broth into a blender. Cut the onion in half and chop one of the halves into large pieces. Add this to the blender along with the garlic cloves, cumin, and oregano. Puree really well so no bits of dried chile remain. Set aside.

Season beef on all sides with the 2 teaspoons of the salt and the 1/2 teaspoon of ground black pepper.

Heat oil in a large Dutch oven over medium-high heat. Once shimmering, add half of the beef—don't crowd the pan. Cook meat until browned on all sides. Remove to a large plate and add the other half of the meat. Brown this batch as well. Each batch should take about 8 minutes.

Return the first batch of beef to the pot along with the chile sauce, remaining broth, and bay leaves. Bring to a boil, stirring to scrape up any browned bits that have stuck to the bottom of the pan. Reduce the heat to low so the sauce is barely simmering. Cook, uncovered until the meat easily pulls apart with a fork and the sauce is silky and luxurious. If the sauce is getting too thick before the meat is cooked, cover the pot and continue cooking. The meat can take anywhere from 2-3 hours.

Serve Chile Colorado with beans, warm tortillas, rice and garnishes.

Cover any leftovers and keep in the refrigerator for up to 5 days or in the freezer for up to 3 months. Reheat in the microwave or stove top fully before eating again.

Monday, July 28, 2025

Spicy Tinga-Style Chicken Tacos with Creamy Lime Slaw & Cilantro

Y'all know I love my tacos. Street tacos are my favorite by far. I've made chicken street tacos a couple of times and have a favorite. Still, I like to try new ones, because one cannot have too many street chicken taco recipes. 

This recipe was spicy AND delicious. The slaw really does a good job cooling it off and adding a nice texture to the taco. 

I also think the ingredients would be easy to replicate. For example "chipotle powder" could be chili powder. 

Spicy Tinga-Style Chicken Tacos with Creamy Lime Slaw & Cilantro
Recipe from Hello Fresh
Serves 2 (maybe three)
  • 1 lime, zested
  • 1/4 oz cilantro
  • 4 oz coleslaw mix
  • 2 T mayo
  • 1 tsp chipotle powder 
  • 10 oz chopped chicken breast
  • 6 small flour tortillas
  • fresh salas

Zest and quarter lime. Roughly chop cilantro.

In a medium bowl, toss coleslaw mix with mayonnaise, 1⁄4 tsp, a squeeze of lime juice, a pinch of salt and pepper, and as much lime zest as you like. Set aside until ready to serve.

Open package of chicken and drain off any excess liquid. Heat a drizzle of oil in a large pan over medium-high heat. Add chicken and season with salt. Cook, stirring occasionally, until chicken is lightly browned, 1-2 minutes.

Reduce heat to medium. Stir in salsa and 1⁄4 tsp chipotle powder. (TIP: Add more chipotle powder if you like things spicy!) Cook, stirring occasionally, until chicken is cooked through and salsa has thickened slightly, 3-5 minutes more.

Wrap tortillas in damp paper towels and microwave until warm and pliable, 30-60 seconds. Divide tortillas between plates. Fill with chicken, slaw (draining first), and cilantro. Serve with remaining lime wedges on the side.


Thursday, July 3, 2025

"Bee Sting" Hot Honey Pepperoni Pizza

Hello Fresh outdid themselves with this one. I've had pepperoni hot honey pizza before and LOVED it, so I was pretty sure I'd love this one. 

First, the only change I made to this recipe is I did NOT use the green pepper. Blech. Instead I had some olives that needed to be used, so I tossed those on. Much better. 

Here's what I liked best about this recipe, and likely changed me forever, the fresh dough. I've always been slightly afraid of dough in any form. It seems too tricky and if you do one little thing wrong, you've blown the whole recipe. Not a fan. I don't like exact when I cook. 

In this case, the dough comes already made. You just have to let it rest and rise and rest and rise. Then stretch it and roll it out. The flavor and the freshness of the dough really made this pizza an all time favorite. I'll be ordering this again when it comes around. 


"Bee Sting" Hot Honey Pepperoni Pizza
Recipe from Hello Fresh
Serves 2
  • 5 oz marinara sauce
  • 1/2 c flour
  • 3 1/2 oz pepperoni
  • 1 long green pepper
  • 1 1/2 oz buttermilk ranch dressing
  • 1 small tomato
  • enough pizza dough to make 2 pizzas
  • 1/2 oz hot honey
  • 1 c mozzarella cheese, shredded
  • 1 shallot, sliced

Adjust rack to top position and preheat oven to 475 degrees. (I baked mine at 425F).

Sprinkle 3 TBSP flour over a clean work surface. Remove pizza dough from packaging and place on floured surface. Shape each piece of dough into a ball. (TIP: Spray your hands with nonstick cooking spray or dust with flour to prevent sticking.) Evenly sprinkle another 2 TBSP flour on top of dough balls (I didn't need 2 T.) Cover with a clean kitchen towel and let rest at room temperature, 20 minutes.

JW Pro tip: Get your dough out of the fridge 30 minutes before so it can come to room temperature. It won't rise if it's chilled. 

While dough rests, halve, peel, and thinly slice shallot. Core, deseed, and dice green pepper into 1-inch pieces. Thinly slice tomato into rounds.

Once dough has rested 20 minutes, line a baking sheet with parchment paper. Working one dough ball at a time, carefully press and stretch dough into a rough oval shape and place on one side of prepared sheet. (TIP: If needed, use a rolling pin to help roll out dough. JW note: I used a rolling pin to get it more even) Repeat with remaining dough.

Cover dough with a clean kitchen towel and let rest 15 minutes. TIP: This will make stretching the dough into a larger shape even easier!

Use floured hands to press and stretch dough on baking sheet into larger oval shapes, about 10 inches long and 5 to 6 inches wide. 

Spread dough with as much marinara as you like; sprinkle with mozzarella. Top with as much shallot, green pepper, tomato, and pepperoni as you like. Drizzle or brush edges of dough with olive oil.

Bake pizzas on top rack until crusts are golden brown and crisp, 14-18 minutes. 

Drizzle pizzas with hot honey to taste. Slice pizzas as desired. 

Divide between plates and serve with ranch dressing on the side for dipping.


Sunday, December 1, 2024

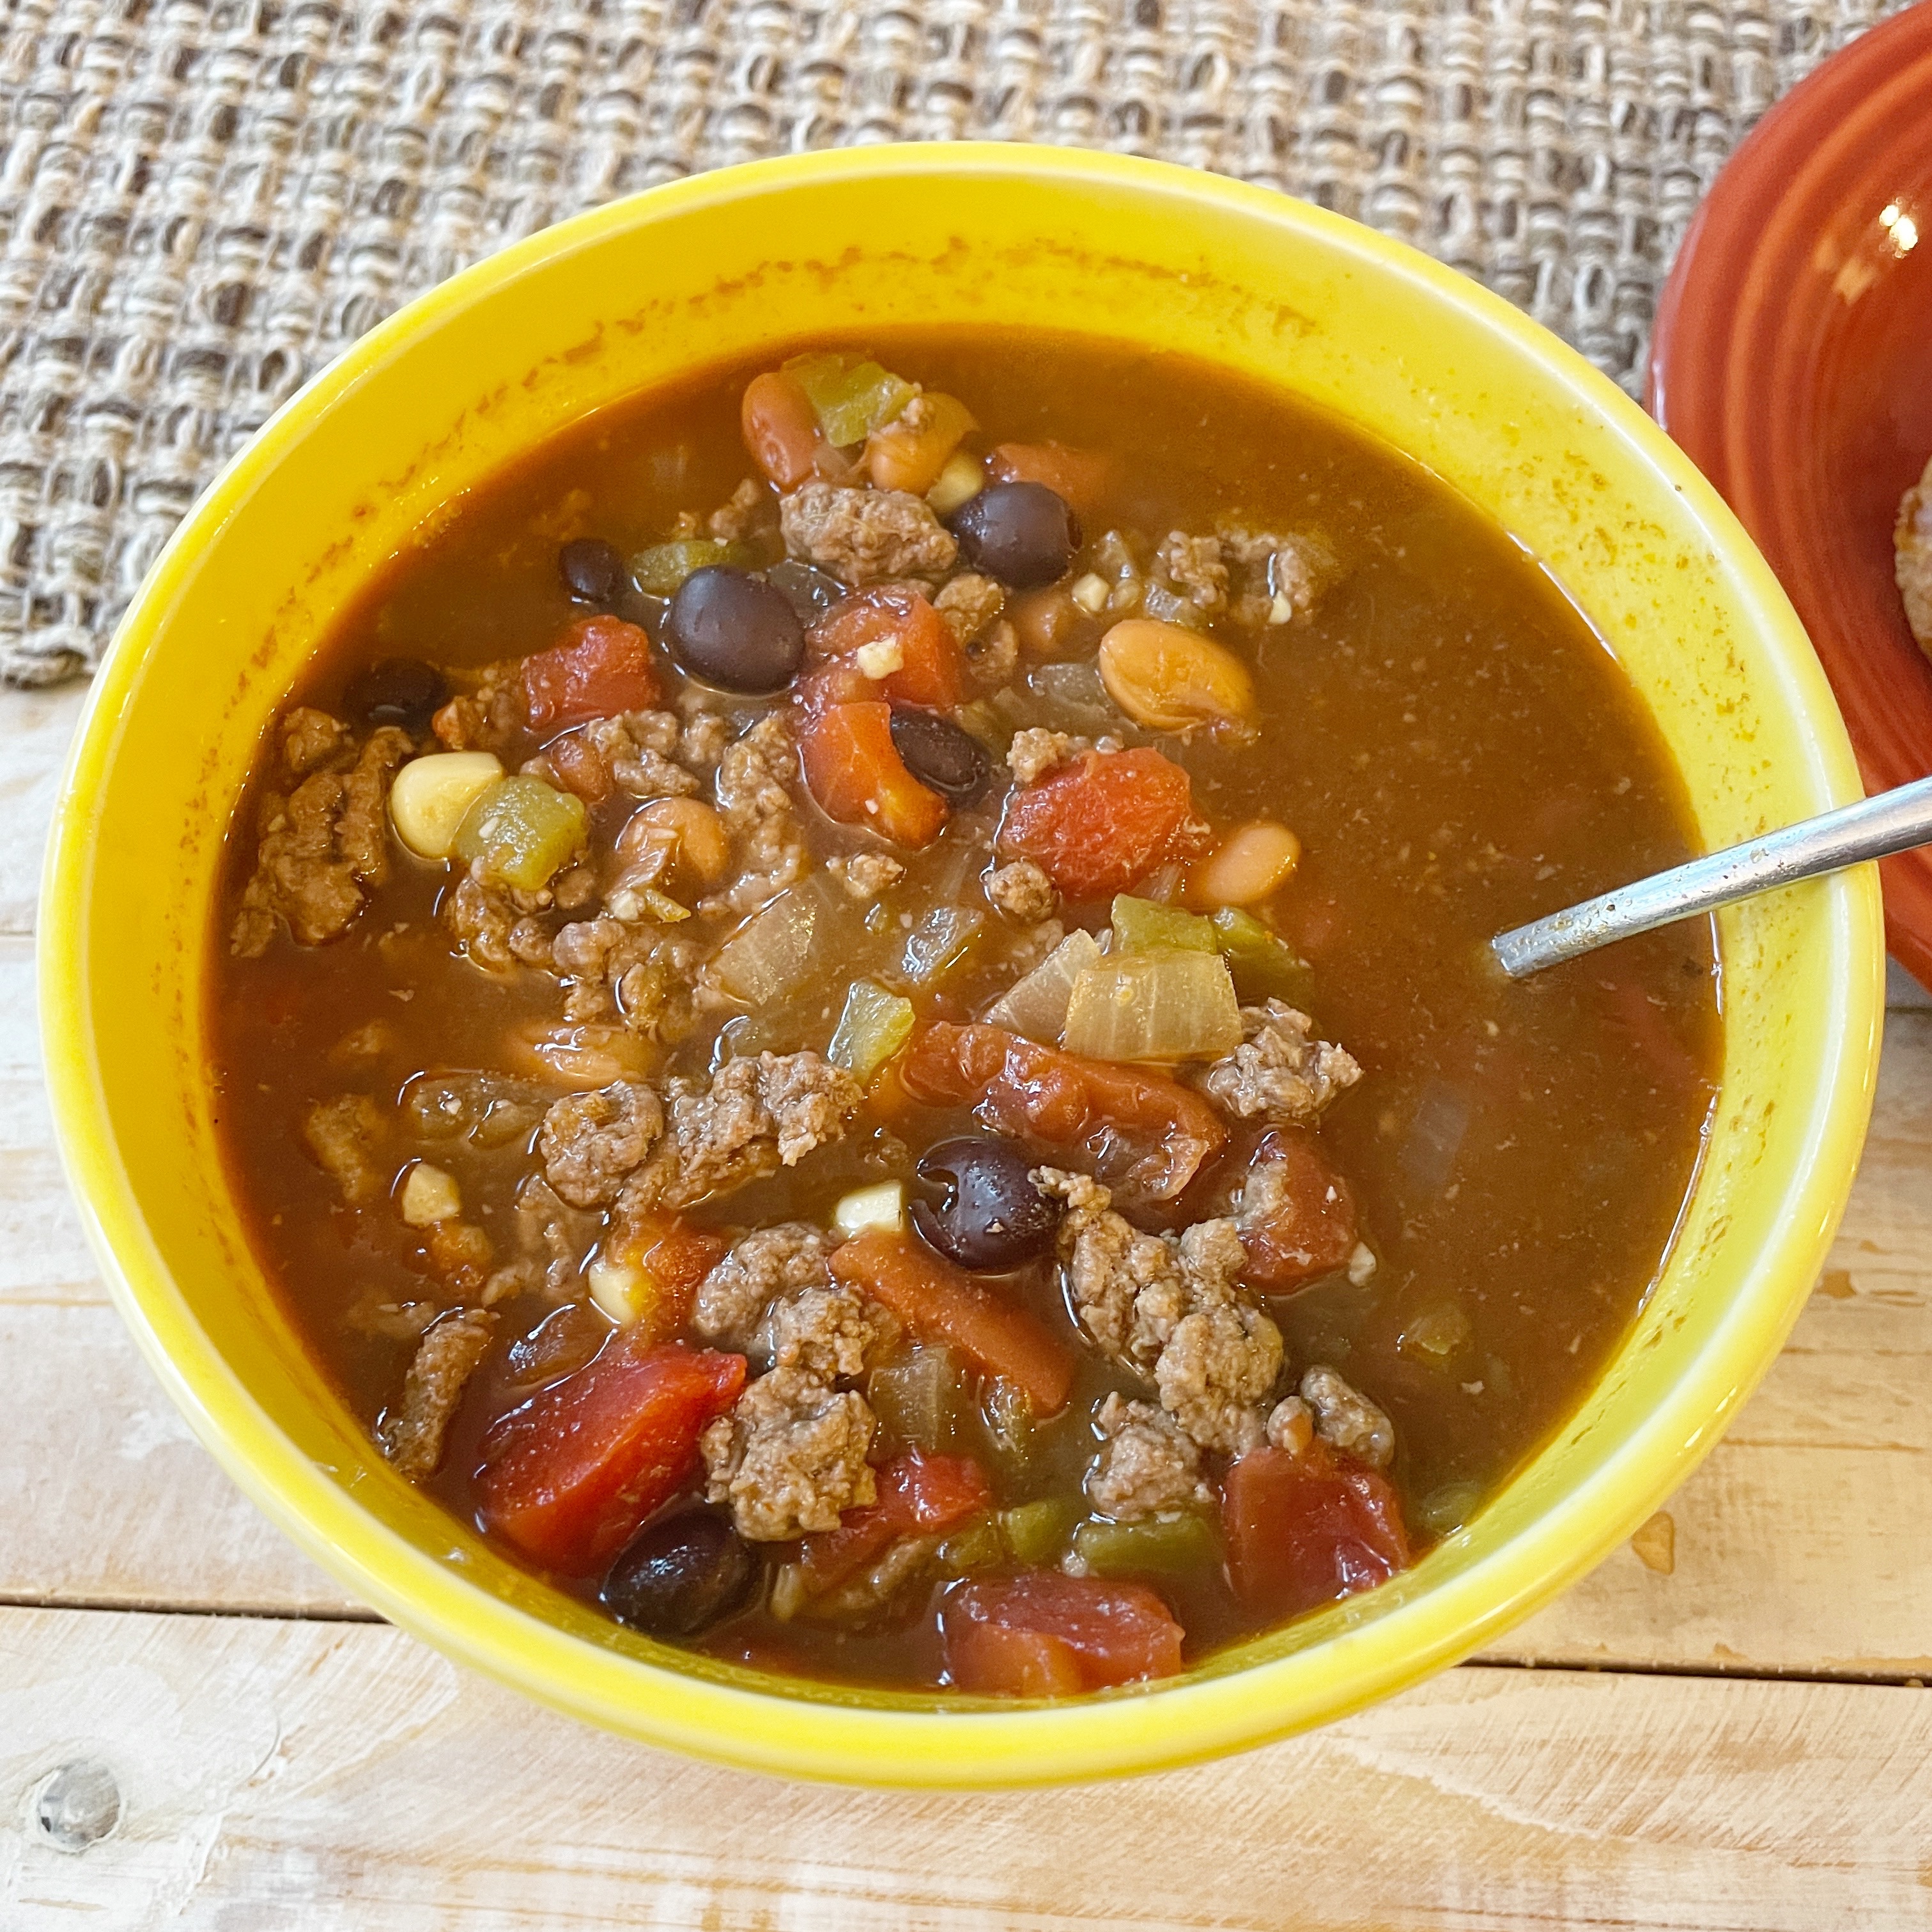
Slow Cooker Nacho Soup

Its C-O-L-D outside! Sunny, but cold. Thank goodness I had planned a soup today. And not just any soup, but Slow Cooker Nacho Soup.

This one is being added to this years favorites. It's that good. I cooked mine for 6 hours on low - I prefer low over high for some reason. The house smelled amazing all day and I just kept getting hungrier and hungrier. 

I was so hungry, in fact, I forgot to put any toppings on it. Honestly, it was fine as it was. I did make one small modification and that was I used a canned of Pinto beans instead of black beans. I had the pinto beans in my pantry and I wanted to use them up. And I prefer pinto over black. 

I also just realized reading the recipe again I completely forgot to put in the shredded cheddar cheese. That would have made this THAT much more amazing. Oh well, guess I have to make it again. 

Slow Cooker Nacho Soup
Serves 6

For the Soup:
  • 1 pound ground beef
  • 1 small onion, finely chopped
  • 2 cloves garlic, minced
  • 1 (15-ounce) can black beans, drained and rinsed
  • 1 (15-ounce) can diced tomatoes with green chilies (like Rotel)
  • 1 (15-ounce) can corn, drained
  • 4 cups chicken broth
  • 1 packet taco seasoning
  • 1 teaspoon cumin
  • 1/2 teaspoon smoked paprika
  • 1 jalapeno, sliced (optional) - I definitely added this
  • 1 (8-ounce) block cream cheese, softened and cut into cubes
  • 2 cups cheddar cheese, shredded
  • salt and pepper, to taste
For Toppings (optional but recommended)
  • sour cream
  • extra shredded cheese
  • tortilla chips (for crunch)
  • sliced avocado or guacamole
  • diced tomatoes
  • sliced black olives
  • green onions
  • fresh cilantro

In a skillet over medium heat, cook the ground beef until browned and fully cooked. Break it up into crumbles as it cooks. Add the chopped onion and minced garlic to the skillet. Sauté until the onion is translucent. (About 3-4 minutes.) Drain any excess fat.

Transfer the cooked meat, onion, and garlic mixture to the slow cooker. Add the black beans, diced tomatoes with green chilies, corn, chicken broth, taco seasoning, cumin, smoked paprika, and jalapeño (if using).

Cover the slow cooker and cook on low for 6-8 hours or high for 3-4 hours.

About 30 minutes before serving, stir in the cubed cream cheese and shredded cheddar. Mix well until fully melted and incorporated into the soup. Taste and adjust the seasonings with salt and pepper as needed.

Ladle the soup into bowls and top with desired toppings. Serve warm and enjoy the hearty, cheesy, nacho-flavored goodness.

Monday, September 30, 2024

Shish Tawook

Photo from Chelsea's
Messy Apron
I've made shish tawook recipes before. My favorite one is slightly different in that it includes cumin. I'm not a fan of cumin so this one is spot on for me. It was delicious. And that "delicious" should be in all caps. 

I grilled my chicken kebab style. That's how I roll and this was the right choice for these cubes of goodness. I marinated the chicken for 5 hours. That seems to be the sweet spot for me with marinades. 

I served the chicken cubes in a pita with tzatziki. Store bought. While this recipe includes a recipe for tzatziki, I decided I needed to just buy it. 

Make this recipe. You won't be disappointed.

Shish Tawook
Serves 4
  • 1 large juicy lemon (1/4 cup juice)
  • 1/4 c olive oil (or vegetable oil)
  • 3/4 c plain full fat yogurt
  • 5 cloves garlic, finely minced
  • 1 T tomato paste
  • 1/2 T red wine vinegar
  • 1 tsp dried oregano
  • 1/2 tsp ground paprika
  • 1/4 tsp ground allspice
  • 2 pounds skinless boneless chicken breasts, cut into even 2 inch pieces
  • Fine sea salt and freshly cracked pepper

MARINATE CHICKEN: Prepare the chicken breasts by patting dry with paper towel, cutting into even 2-inch pieces and placing in a large bowl. In a separate bowl, combine all the marinade ingredients: 1/4 cup lemon juice, 1/4 cup olive oil, 3/4 cup yogurt, 5 cloves of finely minced garlic, 1 tablespoon tomato paste, 1/2 tablespoon red wine vinegar, 1 teaspoon oregano, 1/2 teaspoon paprika, 1/4 teaspoon ground allspice, salt and pepper (to taste; about 1 and 1/2 teaspoons salt and 1/4 teaspoon pepper). Whisk until combined and then pour over the chicken. Stir to generously coat the chicken, cover, and chill. Marinate for 2-24 hours.

TZATZIKI: After making the chicken marinade, make this sauce so it can chill and flavors can develop before serving. Grate a cucumber with the large holes of a cheese grater. Line a small bowl with a few paper towels (or clean kitchen towel) and place the grated cucumber on top. Squeeze as much extra moisture from the cucumber as you can (to keep the sauce from being watery). Once it's drained, place in a medium-sized bowl. Add in the Greek yogurt, minced garlic, red wine vinegar, 1/2 teaspoon lemon zest, 1 tablespoon lemon juice, olive oil, and salt and pepper to taste (about 1/4 teaspoon salt and a pinch of pepper). Place in the fridge until ready to serve. Whisk with a fork right before serving.

COOK CHICKEN: Preheat an indoor or outdoor grill for medium-high heat (400-450 degrees F on an outdoor grill) and generously oil the grates. Thread the chicken onto metal or pre-soaked wooden skewers). Cook on preheated grill until the chicken is golden and no longer pink in the center, about 5 minutes per side.

PITA CHIPS AND TOMATO/CUCUMBER: Preheat the oven to 400 degrees F. Line a large baking pan with Silpat liner or parchment paper. Cut each pita into 8 triangles and arrange evenly on the prepared baking sheet. Drizzle olive oil over the triangles and then use a pastry brush to spread the oil evenly onto the pita bread. Flip the bread and repeat. Sprinkle with salt (about 1/4 teaspoon). Bake for 10 minutes, flipping the pita bread on the other side halfway through bake time. Serve warm with the chicken. For the tomato/cucumber salad, add the halved tomatoes and thinly sliced cucumbers halves to a bowl. Drizzle on a little olive oil and sprinkle on some salt and pepper (to taste).

ASSEMBLE: With the back of a spoon, spread hummus on the base of 4 large plates. Divide the cooked quinoa evenly among the plates. Divide chicken skewers evenly among the plates. Top with tomato/cucumber, and finally drizzle even parts of tzatiki sauce (or serve on the side) over plates. Divide up the pita chips. Season individual plates with salt, pepper and lemon juice as needed. Serve immediately.

Sunday, August 25, 2024

Keto Chocolate Chip Muffins

In all the recipes I've tried that calls for Almond Flour, I've generally not been a fan. Especially bread of any type. I keep trying them though hoping that I'll stumble on a recipe that is good. 

I have found one! Yipee. 

This recipe is simple and delicious, even with almond flour. It's also the first time using sugar free chocolate chips. I had Hershey sugar free chips on hand, so that's what I used. I am amazed at how good they are. 

Overall, this one is going into the "favorites" list for this year. If you're looking to lower your sugar intake and maybe eat something low carb, I highly recommend these. 

A serving size is one muffin. 200 calories, 6.3 g carbs, 3 g fiber and 10 g protein. Not too shabby. 


Keto Chocolate Chip Muffins
Recipe from All Day I Dream About Food
Makes 12 muffins - maybe. I only got 10 out of this batch
  • ½ cup sour cream
  • 3 large eggs
  • ¾ teaspoon vanilla extract
  • ½ cup Swerve Brown lightly packed
  • 2 ½ cups almond flour
  • ⅓ cup unflavored whey protein powder (can sub egg white protein)
  • 2 teaspoon baking powder
  • ¼ teaspoon salt
  • ⅓ cup + 1 tbsp mini keto chocolate chips

Preheat the oven to 350F and line a standard metal muffin pan with 12 parchment paper liners. You can also use silicone liners.

In a large bowl, whisk together the sour cream, eggs, and vanilla extract. Add the sweetener and whisk until well combined, breaking up any clumps with the back of a fork.

Add the almond flour, protein powder, baking powder, and salt and stir until well mixed. Stir in ⅓ cup of the chocolate chips

Divide the batter evenly among the prepared muffins cups and top each with a few more mini chips. Bake 18 to 25 minutes, until golden brown and firm to the touch.

Remove and let cool in the pan.

Thursday, August 8, 2024

Korean Meatballs

Korean food is not something I eat a lot of. I like bulgogi and that's about all I've had. I like the flavors in Korean food and so when I saw this recipe I thought it'd be a fun one to try. 

And I was right!

Somewhat simple recipe but it packs a lot of flavor. The gochujang is so robust in it's flavor and it definitely puts off the heat. First time cooking with it, and I love it. 

If you don't know what gochujang is: 
"Gochujang or red chili paste is a savory, sweet, and spicy fermented condiment popular in Korean cooking. It is made from gochu-garu, glutinous rice, meju powder, yeotgireum, and salt. The sweetness comes from the starch of cooked glutinous rice, cultured with saccharifying enzymes during the fermentation process.

I can see why so many people get obsessed with this condiment. It's amazing. Better than, dare I say, sriracha. I suppose better isn't far, it's different and it's delicious. 

Ok. I'll stop gushing over gochujang. Make this recipe! 5 STARS! 

The sauce was spicy, the meatballs didn't appear that spicy. You can control that spice though by more or less gochujang. 

The ONLY change I made is used a keto friendly brown sugar and honey.


Korean Meatballs
Recipe from Dancearoundthekitchen.com
Serves 4-6

Meatballs
  • 1 lb 80-85% lean ground beef
  • 1 tablespoon gochujang
  • 2 tablespoon sliced green onions
  • 1 egg
  • 1 teaspoon garlic powder
  • 1 teaspoon ground ginger
  • ½ c saltine crumbs (or panko bread crumbs)
Sauce + Garnishes
  • ¼ c water
  • ¼ c soy sauce
  • 1 tablespoon cornstarch
  • 2 tablespoon vinegar
  • ½ c brown sugar
  • 1 tablespoon gochujang
  • ¼ c honey
  • ½ teaspoon red pepper flakes optional
  • Sesame seeds and additional green onions for garnish
Preheat oven to 400°F.

In a large bowl, add ground beef, gochujang, green onions, egg, garlic, ginger and saltine crumbs.

Use a wooden spoon or your hands to combine.

Scoop and roll about 1 inch meatballs; place on a parchment-lined baking sheet.

Bake for 15-20 minutes or until the center of the meatball reaches 160°F.

While the meatballs are cooking, make the sauce. In a medium-sized saucepan, whisk together the water, soy, cornstarch and vinegar. Then whisk in the brown sugar, gochujang and honey.

Place the sauce over medium heat, whisking frequently, until it reaches a boil. Let the sauce boil for 5 minutes and remove from the heat.

Once the meatballs are out of the oven, add them to the sauce and carefully stir to coat.

Garnish with additional sliced green onions and sesame seeds.

Sunday, April 21, 2024

Pinquito Beans

In California in the mid 80s my dad discovered Tritip. I don't really know how he discovered it, but it
was an inexpensive hunk of meat that he got really adept at grilling. As Mom and Dad did, they invited a gaggle of friends to dinner one Friday night and a family friend, John Ortiz brough Pinquito beans. 

The story, as I remember it, was they are special beans only found in Santa Maria California. They're small pink beans (thus pinquito). The recipe was one John had found in a newspaper. 

Mom was hooked. We had pinquito beans several times a year when we'd have tritip. So the two became a couple to me. If you have tritip you have pinquito.

When we moved to Washington a sadness fell across the Wraspir house, you couldn't get pinquito beans in Washington state. Mom, ever resourceful though, had a friend in Lancaster send pounds of these beans to us. In one of the bags, Mom was gifted this recipe!

You can tell it was well used. I love finding these type of recipes in the Gray box. It shows it was one of their favorites AND that mom was a messy cook like me. Or, more likely, Dad did the cooking cuz he WAS a messy cook. 

I made these for Sherrie's birthday meal. She requested ribs. I wanted to make some baked beans, but she doesn't like them, so I opted for pinquito. You still can't find them in Wa state, but thank god for Amazon. 

I didn't soak the beans, I boiled them for 2 hours and then followed the rest of the recipe. I did not include MSG. I am not a fan so thought I could easily keep it out. 


Pinquito Beans
Recipe from ?? It was in Mom's Gray Recipe Box
Serves 10 easily
  • 2 lbs Pinquito beans
  • 1 envelope chili mix
  • 1 medium onion, diced
  • 2 cloves garlic, minced
  • 1/2 lb bacon diced
  • 1/2 lb ground beef
  • 1/2 tsp pepper
  • 4 tsp salt
  • 1/2 tsp oregano
  • 1/2 tsp MSG
  • 1 1/2 c tomato juice

Cover beans with water, bring to a boil and add salt and pepper. Turn heat to simmer and cook two hours or until tender. 

Sauté bacon, onion, garlic, seasonings, chili mix, tomato juice and ground beef.  Add mixture to beans and simmer one hour and serve. 

Thursday, March 14, 2024

Taco Soup

Well the sun is out here in Seattle. It's supposed to be 70F by Saturday. Looks like soup season might be winding down. 

This soup... oh my goodness...I am not even sure what to say about it other than it was FAN-FREAKIN-DELICIOUS!! It's definitely going into the favorites category for this year. 

It's a simple soup, but it packs a lot of flavor and textures. It's definitely hearty.  And the best part I had almost everything in the pantry to make this soup. I didn't have diced tomatoes with green chilies. BUT I had diced tomatoes and a can of green chilis. Close enough. 

I didn't change anything in this recipe (well except the diced tomatoes) significantly. I added a hit of hot sauce and a bit more chili powder. I served it along side warmed up flour tortillas - great for dipping in the broth.

Taco Soup
Recipe from The Clean Couple
Serves 4
  • 1 teaspoon olive oil
  • 1 lb ground beef
  • 1 cup onion chopped (1 medium onion)
  • ½ tablespoon garlic minced (about 4 cloves)
  • 1 14 oz can diced tomatoes with green chiles
  • 1 quart beef broth low or no salt
  • 1 teaspoon paprika
  • ½ teaspoon pepper
  • 1 teaspoon chili powder
  • ½ teaspoon cumin
  • 1 can black beans drained & rinsed
  • 1 can pinto beans drained & rinsed
  • 1 cup frozen corn thawed

In a soup pot, heat olive oil. Brown beef, onions and garlic for 10-12 minutes until cooked.

Add in tomatoes, broth, spices, beans and corn.

Stir together. Bring to a boil, then reduce to a simmer for 30 minutes to an hour.

The original website with this recipe has instructions for Instant Pot and Crock Pot.

Tuesday, February 6, 2024

Witches Brew Soup / Stew

Having made this recipe now, I realize it's designed for Halloween, but I really don't care. 

This was delicious. At least the version I made. I completely missed the Italian Sausage and didn't have that to add. Which, I guess is ultimately ok because I'm not a huge fan of Italian sausage. 

What really made this recipe was the onion soup mix. It never occurred to me to add that to soup! I'll do that more often now. Such a great flavor. But, be careful! It can be a bit salty. I highly recommend not salting your soup until you've tasted it after you add the soup mix. 

I also missed that this was a slow cooker recipe. I didn't start it until 5pm tonight and, well, no time for slow cooking. I'm not sure it needs a slow cooker though. I let it simmer for 45 minutes and it was just fine. 

I'm going to add this to my favorites list! It was that good. And on a cold, wet, rainy day it was darn near perfect. 


Witches Brew Soup / Stew
Recipe from My Incredible Recipes
Serves 6
  • 1 pound Italian sausage
  • 1 pound lean ground beef
  • 1 3-ounce package of shallots, diced
  • 2 1 ounce packets of onion soup mix, divided
  • 1 8-ounce package of large white mushrooms
  • 4 large carrots peeled
  • 1 c celery chopped
  • ½ 1.5 pounds bag of baby gemstone potatoes, halved
  • 5 c beef broth
  • 1 14-ounce can Italian- style petite diced tomatoes
  • 3 T red wine vinegar

Heat a large skillet over medium heat and brown the Italian sausage and lean ground beef with the diced shallots and one packet of onion mix until cooked through, about 5-8 minutes.

As the meat cooks, slice the mushrooms in half and poke eyes into each rounded side with a chopstick or toothpick.

Cut two triangular wedges out of one side of each carrot and discard. Slice each carrot, forming “pumpkin” shapes.

Once the meat has finished cooking, transfer it to a large slow cooker, leaving behind any extra grease in the pan.

Mix the mushrooms, carrots, celery, and potatoes in the large skillet with the extra grease and heat over medium-high heat for 3-5 minutes to begin searing the vegetables. Be sure to stir frequently.

Transfer the vegetables into the large slow cooker with the meat and sprinkle the second packet of onion soup mix all over the vegetables.

Add the beef broth, diced tomatoes, and red wine vinegar and stir until well combined.

Cover with a lid and cook on high for 2-3 hours or low for 4-6 hours or until the vegetables are softened enough to pierce easily with a fork.

Enjoy your Witches Brew Stew hot.

Wednesday, January 17, 2024

Portuguese Chicken with Mushrooms & Port Wine

Photo from Portugueserecipes.ca
After returning from Portugal I spent some time looking up Portuguese recipes for our Portuguese
Sunday dinner. This was one of the recipes I found and I finally got a chance to make it. 

The Pantry Goat came over tonight to talk PM stuff and I thought she'd enjoy this meal. I served this with mashed potatoes and it was the perfect side to this. 

If you've had Chicken Madeira or Chicken Marsala, the flavors are similar. NOT the same, but similar. The sweet, tartness of the Port really adds an amazing flavor to this dish. 

I thought I followed the recipe but realized only after dinner that I didn't dredge my chicken in flour. Frankly, I don't think you need to. I just let the liquid boil longer so it reduced down. 

I also added a splash of cream to it because, why not?

I'd make this again, and again, and again. It's being added to my favorites too.

Portuguese Chicken with Mushrooms & Port Wine
Recipe from Portugueserecipes.ca
Serves 4

  • 1 c flour
  • Salt (to taste)
  • Ground black pepper (to taste)
  • Oregano (to taste)
  • 1 lb of chicken breast, cut into steaks
  • 1 T olive oil
  • 2 T butter
  • 1 clove of garlic, minced
  • 1 c fresh cut mushrooms
  • Salt and black pepper (to taste)
  • 1/2 c Port wine
  • 1/2 c chicken broth

In a large bowl, combine the flour with some salt, black pepper and oregano (to taste).

Add the chicken steaks to the flour mixture and move them around so they are covered with the mixture and remove any excess flour.

Heat the oil and 1 tablespoon of butter in a large skillet over medium-high heat.

Add the chicken and cook until the chicken is well cooked inside and golden on the outside, 5 to 8 minutes on each side.

Drain the chicken in a dish lined with absorbent paper.

Melt 1 tablespoon of butter in the same skillet over medium heat, add the garlic let it brown slightly, than add the mushrooms, and cook for about 10 minutes.

Season with salt and black pepper, then add the Port wine and chicken broth.

Transfer the chicken steaks to a pan and pour the sauce with the mushrooms over it.

Increase the heat to medium-high and bring to a boil.

Cover, reduce the heat to medium-low and cook until the sauce thickens, about 5 minutes.

Serve the steaks over boiled rice sprinkled with chopped parsley.

Recipe & Photo Credit: milrecetascocina.com

Monday, October 16, 2023

Porto Bifanas (132 of 150)

Oh bifanas! My favorite thing to eat in Portugal. They're everywhere and they are oh so good. I did notice they changed ever so slightly as we traveled around Portugal. 

What is a bifana? Simply put, it's a steak sandwich. A pork steak, to be more specific, seasoned with garlic and other spices. They are then put inside a hard bread roll. Simple, right? 

I found this interesting tidbit on the tasteporto.com site. 

Not all Bifanas are created equal

In the North of the country, it is usually made with little pieces of steak that have been spiced and seasoned in a big pot with sauce, and it’s usually a bit spicy. The bread is a simple white bread roll, that ends up being moistened with the steak sauce. Check out this video, of bifanas simmering at Conga, to get what I’m saying.

As you go further south, though, the steak is no longer cut and is instead beat with a mallet, it is mostly garlicky and not spicy at all – instead, they suggest you eat it simple or with mustard. Also, the bread is lightly toasted. And, sadly, there is less sauce as well.

And to that tune, the bifana I made was very different, but oh so yummy. I followed this recipe 100%. I doubled it because I was feeding 8 people. The only thing I didn't quite double was the whisky. I only had 5 tablespoons handy. I also let it cook for about 2 hours and y'all...it was so amazing. 

I had had a bifana in Cascais that had a garlic schmear on the bread, so I wanted to duplicate that somehow. I made the bread a roasted garlic bread. It was amazing. 

I had yellow mustard, Dijon mustard and Piri Piri sauce handy to put on the sammy. 

Porto Bifanas
Recipe from Portugueserecipes.ca

Serves 4

1 lb of thin pork cutlets
1/2 cup of olive oil
5 cloves of garlic, crushed
1 tablespoon of paprika
2 tablespoons of hot red pepper sauce
3 bay leaves
3/4 cup of white wine
3/4 cup of beer
4 tablespoons of whiskey
2 tablespoons of Port wine
1 small lemon, juice
Coarse salt (to taste)
2 teaspoons of piri piri sauce

Put olive oil, rolled garlic cloves, paprika, pepper sauce and bay leaf in a pan and mix.

Turn on the heat and let the garlic saute a little to release flavor but don't let it burn.

Add the wine, beer, whiskey, port wine and a pinch of salt.

When it boils, add the meat and mix it well in the sauce.

Drizzle with half of the lemon juice, add the piri piri sauce and the remaiding lemon juice to the pan.

Let it simmer for about 45 minutes, so that the meat is tender, if you see that you need more sauce, add some more beer or white wine (do not add water).

Before removing from the heat, check the seasoning.

Tuesday, August 8, 2023

Carne Asada Tacos (104 of 150)

I've made several carne asada street tacos in my day. To date, this has been my favorite. It's lead ends today! 

That's right, this recipe was so delicious that I swear it came from a restaurant. The key, thin skirt steak! I specifically asked the butcher for thin skirt steak this time. The recipe doesn't call for it, but I noted that restaurant carne asada is always thin. Thinner than flank steak, which is what most carne asada recipes use. 

When I saw skirt steak on this ingredient list, I figured why not as for it to be thin. I literally told the butcher I was making carne asada when he asked "how thin?" and he cut it perfectly. (BTW, befriend the butcher in your favorite grocery store. They can usually give you inside scoop on cuts and are always happy to cut something special.)

I served this along side the traditional onion, cilantro, lime salsa. I'll be burping onions all night, but it was worth every bite.

I marinaded it for 6 hours. The steak can take it and I think that's the reason this one was so damn yummy.

Carne Asada Tacos
Recipe from Baking Mischief
Serves 4

Carne Asada Marinade
  • 1 1/2 to 2 pounds skirt, flank, or flap steak
  • 1/2 c orange juice bottled is fine
  • 1/2 c soy sauce low-sodium is fine
  • 1/4 c lemon juice bottled is fine
  • 1/4 c olive oil
  • 2 T lime juice bottled is fine
  • 2 cloves garlic pressed or diced
  • 1 tsp chili powder
  • 1 tsp ground cumin
  • 1 tsp paprika
  • 1 tsp dried oregano
  • 1 tsp black pepper
  • 1/4 tsp ground chipotle chili pepper OR 1 tsp finely chopped canned chipotle pepper, optional
  • 1/2 bunch fresh cilantro chopped about 3/4 cup very loosely packed

Tacos
  • 1/2 red onion sliced into 1/4-inch rounds (do not separate the layers)
  • 1 medium avocado sliced
  • 8 taco-size tortillas flour or corn are fine
  • 1/2 bunch chopped cilantro for topping
  • 2 limes quartered, optional for topping
Carne Asada Marinade

Place steak in a gallon plastic bag or shallow container for marinating. In a liquid measuring cup or medium bowl, stir together all marinade ingredients and pour marinade over the steak. Place in the refrigerator and marinate for at least 4 hours, preferably overnight, flipping the meat halfway through.

Carne Asada and Onions

Adjust the top rack in your oven so it’s about 4 inches from the broiler and heat broiler on high. Transfer meat to a foil-lined heavy-duty baking sheet or broiler pan. Place onion rounds around the meat on the baking tray wherever they will fit.

Broil for 4 to 6 minutes per side (flip both the meat and the onion rounds), until an instant-read thermometer inserted into the thickest part of the steak reads 135°F for medium-rare, 145°F for medium.

If onions have not yet reached your desired level of doneness, you can transfer the meat to a cutting board and return onions to the oven. Once onions are done, slice the rounds in half, separate the slices, and toss them in the pan juices. Allow the meat to rest for 5 minutes before slicing across the grain into strips.

Assemble Tacos

Gently warm tortillas by placing them on a plate and covering the stack with a damp paper towel. Microwave until heated through, about 30 seconds to 1 minute.

Top warmed tortillas with sliced carne asada, onions, sliced avocado and cilantro. If desired, add a squeeze of lime juice, and enjoy!

Tuesday, June 6, 2023

Chicken Lo Mein (83 of 150)

Yay. I have a recipe to add to my 2023 favorites! This recipe was delicious. Well, the way I made it was. I did make a couple modifications. 

Making Chinese food at home is so much better than ordering out. It's less expensive, and you know what it's going into it. It's also often just faster. 

The original recipe has this being made in an Instant Pot. I don't have one of those, so I followed the stove top instructions. 

Now for the modifications. I wanted to use what I had on hand. I didn't have mushrooms or spinach. I swapped those out with water chestnuts and snow peas. I dropped those in at the last minute to just warm through. 

Other than that, I followed the rest of the recipe. Don't skimp out and NOT buy Lo Mein noodles. That makes all the difference. Oh, yah. I had to add about 2 tsp of cornstarch at the end. It was still too liquidy. I don't think you need as much chicken stock as it calls for. 

Chicken Lo Mein
Recipe from My Kitchen Escapades
Serves 4

  • 1 T vegetable oil
  • 1 pound chicken breasts, diced
  • 1 carrot, julienned
  • 1/2 onion, chopped
  • 1 c chopped portabella mushrooms
  • 3 c fresh spinach
  • 2 cloves garlic, minced
  • 1 1/2 c chicken broth
  • 3 T soy sauce
  • 2 tsp rice wine vinegar
  • 2 tsp brown sugar
  • 1 tsp sesame oil
  • 1 tsp oyster sauce
  • 1/2 tsp ground ginger
  • 1/2 tsp sriracha
  • 8 ounces lo mein noodles

Sauté and add vegetable oil. 

Add carrot, onion, mushrooms, spinach, and garlic and sauté for 2 minutes. Add chicken and cook until brown. Add remaining ingredients, simmer for 10 minutes. 

Stir the noodles together, and serve immediately.

Tuesday, December 22, 2020

Trifecta Chicken (aka Crispy Chicken Breasts with Lemon & Capers)

This is recipe #2 from the recipe swap I did with my buddy Paul. I was supposed to make it last night, but - well last night just didn't happen the way it planned. 

Tonight I made this chicken with the Lemon Spaghetti from last night. According to Paul, the two must be eaten together.

This recipe takes some time to marinate the chicken. So be sure to plan. Otherwise, this was delicious. Making your own bread crumbs is really key here. Paul had told me to not use Panko and to take the time to make my own bread crumbs. He was not wrong. Homemade bread crumbs are easy and they are so much more crunchy. 

I cooked mine in the air fryer at 450 for about 20 minutes.  It was a bit over done, but I like my chicken well done, so I was fine with it. 

Trifecta Chicken (aka Crispy Chicken Breasts with Lemon & Capers)
Recipe from Paul
Serves 4

  • 4 small boneless, skinless chicken breast halves (6 to 7 oz. each), trimmed of excess fat
  • 3/4 c freshly grated Parmigiano-Reggiano
  • 5 T capers (preferably nonpareils), rinsed, patted dry, and chopped
  • 2 T chopped fresh thyme
  • 3 T extra-virgin olive oil
  • 2 T Dijon mustard
  • 1 lemon, zest finely grated, cut into wedges
  • 1/2 tsp kosher salt
  • 1/2 tsp freshly ground black pepper
  • 3-1/2 c Toasted Breadcrumbs

Heat the oven to 450°F. Put a flat rack on a large rimmed baking sheet lined with foil.

With a meat pounder or a heavy skillet, lightly pound the chicken between two sheets of plastic wrap to even out the thickness of the breasts.

In a large bowl, mix 1/4 cup of the Parmigiano, 2-1/2 Tbs. of the capers, 1 Tbs. of the thyme, and the oil, mustard, lemon zest, salt, and pepper. Squeeze one or two of the lemon wedges to get 1 Tbs. juice and add to the mixture, along with 2 Tbs. water. Add the chicken and toss to coat well. You can proceed directly to coating the chicken breasts with crumbs, or let them marinate in the fridge for up to 24 hours.

Put the breadcrumbs in a large shallow dish and toss with the remaining 1/2 cup Parmigiano, 2-1/2 Tbs. capers, and 1 Tbs. thyme. Working with one piece at a time, transfer the chicken to the dish of crumbs, scoop some crumbs on top, and press well a couple of times so the crumbs adhere to both sides. Transfer to the rack on the baking sheet.

These crumbs are coarser than your average breadcrumbs, so it takes a little extra force to get them to adhere. My method is to pat a healthy amount of breadcrumbs on top of the chicken and then use the heel of my hand and a firm rotating motion to press the crumbs onto the chicken. Don’t shake off the excess when transferring the breasts to the baking sheet; you want to keep as many crumbs on the chicken as possible.

Bake the chicken until it’s firm to the touch and registers 165°F on an instant-read thermometer, about 20 minutes. Serve immediately with the remaining lemon wedges for squeezing over the chicken.

Make Ahead Tips

Make the crumbs ahead. They’ll keep for up to 3 days in an airtight container at room temperature. Or if you want to whip up a few batches of crumbs, you can store them in a zip-top bag in your freezer for a couple of months.

Marinate ahead. You can pound the chicken and immerse it in the sticky flavor bath the day before you plan to cook it. The results will be excellent because the flavors will really sink into the meat.