Friday, November 29, 2024

Grilled Steak Kabobs

I needed an easy Friday night dinner and I didn't want it to be turkey leftovers. I have made a thousand and one marinade recipes and each one is about this same as the last. This recipe wasn't that different from the others. 

I did like the extra flavor of the lemon in this marinade. It added a nice freshness to it. I marinaded mine for 5 hours - which is the magic amount of time for me.


Grilled Steak Kabobs
Recipe from I Heart Naptime
Serves 4

Steak kabob marinade
  • 1/4 cup extra-virgin olive oil
  • 2 Tablespoons light soy sauce , or coconut aminos
  • 2 Tablespoons apple cider vinegar
  • Juice of 1 lemon , about 2 Tablespoons
  • 2 Tablespoons light brown sugar , or honey
  • 1 teaspoon minced garlic
  • 1 teaspoons kosher salt
  • 1/4 teaspoon cracked black pepper
  • 2 pounds sirloin steaks , cut into bit sized pieces
Vegetables for kabob
  • 2 zucchinis , sliced
  • 3 bell peppers (I use orange, red and yellow) , cut into bite sized pieces
  • Salt and ground black pepper

Steak kabob marinade:

Place olive oil, soy sauce, vinegar, lemon juice, brown sugar, garlic, salt, and pepper in a large bowl or gallon-sized zip-top bag. Stir or shake until combined. Place meat inside the bag and let sit for at least 30 minutes (up to 5 hours). If you have more time, let it sit longer.

Prepare kabobs

Preheat the grill to medium-high heat and close the lid. Thread meat and vegetables through skewers.

Place the skewers on preheated grill. Turn the skewers until nicely browned on all sides and the meat is no longer pink, about 10 to 15 minutes. Season with salt and pepper before serving, if desired.
Thursday, November 28, 2024

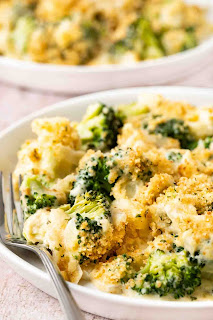
Baked Parmesan Broccoli Casserole

Photo from Dinner
Then Dessert
Thanksgiving is always ... ALWAYS about the food for our family. And I've kept that tradition going strong. I follow every recipe that we've made for years to the T. It's the way Thanksgiving is to be for me. 

Except, this year. I love our family's Broccoli Casserole, but it makes SOOO much and I was only feeding 4. I still wanted a vegetable, and I still wanted broccoli. Then I found this recipe. 

It was delicious. Super easy to throw together, which is helpful for Thanksgiving. The leftovers were just ok to me - mostly because I LOVE the broccoli casserole leftovers, warm or cold. 

I'd make this again just for me. It was that easy. 

I chose to not do the Ritz topping. I didn't want to buy an entire box of ritz for just a few crackers. So I swapped out the Ritz crackers with Fried onions! I burned them in the oven, but they were still delicious. 

Baked Parmesan Broccoli Casserole
Serves 8

6 tablespoons unsalted butter divided
  • 1 yellow onion finely chopped
  • 1 garlic clove minced
  • 1/4 cup flour
  • 2 cups whole milk
  • 1 large egg
  • 1/2 teaspoon kosher salt
  • 1/2 teaspoon coarse ground black pepper
  • 1/2 teaspoon paprika
  • 1 cup Parmesan cheese grated
  • 4 cups broccoli cut into bite sized florets
Topping:
  • 4 tablespoons unsalted butter
  • 1 cup ritz crackers crushed
  • 1/4 cup grated parmesan

Preheat oven to 400 degrees and spray a 9x13" baking dish with vegetable oil spray.

Add 3 tablespoons butter to a large skillet on medium heat.

Add the onions and cook until just translucent, about 4-5 minutes.

Add in the garlic and cook until just fragrant, about 30 seconds.

Add in remaining butter.

In a separate bowl whisk together flour, milk, egg, salt, black pepper and paprika.

Bring to a simmer until it just begins to thicken, about 2-3 minutes.

Add in Parmesan cheese and broccoli.

Stir to coat, then pour into baking dish.

Topping:

Add butter to a large skillet on medium heat.

When melted add ritz crumbs and parmesan cheese.

Stir to coat well and cook until crispy and just beginning to brown, stirring occasionally until it begins to brown.

Add to the top of the casserole and bake for 30 minutes.


Tuesday, November 26, 2024

Mushroom Swiss Burger

I love a good burger. The juicier and drippier the better. But every now and then you need a burger that just sits politely on the plate and waits for you to devour it. This is that burger. 

I chose to not eat this with a bun (trying to be lower carb you know) and this burger really holds up without a bun. I like finding burgers that are almost better without the bun. 

The mushroom topping is off the charts delicious. I had more mushrooms than most would put on a burger with a bun, but the point was to replace the bun with better for me stuff. 

Be sure you get a good quality swiss cheese too. I used Tillamook and it was spot on. 

I'd make this again for sure.


Mushroom Swiss Burger
Serves 4

Mushroom Topping:
  • 2 tablespoons butter
  • 8 ounces sliced mushrooms (Cremini or Baby Bella)
  • 1 small onion, sliced
  • 1 clove garlic, minced
  • 1 tablespoon Worcestershire sauce
  • Salt and pepper to taste

Burger Patties:
  • 1 pound ground beef (80/20 blend)
  • 1 tablespoon steak seasoning (or mix of salt, pepper, garlic powder)
  • 1 teaspoon Worcestershire sauce
  • Other:
  • 4 slices Swiss cheese
  • 4 hamburger buns (brioche or potato buns recommended)
  • Optional toppings: lettuce, tomato, mayonnaise, mustard
Photo by Insanely Good
Recipes. Doesn't it look
Yummy?

Prepare the mushroom topping: Melt the butter in a skillet over medium heat. Add the mushrooms and onions. Sauté until tender and lightly browned, about 8-10 minutes. Stir in the garlic and Worcestershire and cook for 1 more minute. Season with salt and pepper to taste. Set aside and keep warm.

Make the burger patties: Add the ground beef, steak seasoning, and Worcestershire sauce to a bowl. Mix until just combined. Form into 4 patties slightly larger than the buns (they will shrink when cooking).

Cook the burgers: Heat a cast iron skillet or grill over medium-high heat. Cook the patties for 3-5 minutes per side. During the last minute of cooking, top each patty with a slice of Swiss cheese and cover to melt.

Toast the buns: Brush the cut sides of the buns lightly with butter or oil. Toast cut-side down in a skillet or on the grill until lightly browned.

Assemble the burgers: Place the patties on the bottom buns. Top generously with the sautéed mushrooms and onions. Add any other desired toppings. Cover with the top bun.

Serve the mushroom Swiss burgers immediately while hot. Enjoy!

Friday, November 22, 2024

Classic Spaghetti and Meatballs

I'm not one to order spaghetti and meatballs out, and I've not made it but a handful of times. I've been disappointed with most the recipes I've tried. This one did not disappoint. 

I love the smaller meatballs. The texture is better for me for some unexplained reason. These are super flavorful meatballs and I actually got the seasoning right (sometimes I don't salt them enough). 

The tomato sauce I wasn't as big of a fan of. I like my marinara recipe better. I think this one has too much Italian Seasoning for me. And I'm not sure I like the wine in it. 

I ate it and I enjoyed it. I'd make the meatballs again for sure, but would likely use my own marinara recipe. 

Classic Spaghetti and Meatballs
Recipe from Damn Delicious
Serves 8

FOR THE MEATBALLS:
  • ½ c freshly grated Parmesan
  • ⅓ c Panko
  • ⅓ c chopped fresh parsley leaves
  • ½ c milk
  • 1 large egg
  • 1 small shallot, diced
  • 3 cloves garlic, minced
  • Kosher salt and freshly ground black pepper, to taste
  • 1 pound lean ground beef
  • 1 pound ground pork

FOR THE SAUCE:
  • 2 T olive oil
  • 1 medium sweet onion, diced
  • 3 cloves garlic, minced
  • 2 tsp Italian seasoning
  • ½ tsp fennel seeds
  • ¼ tsp crushed red pepper flakes
  • ⅓ c dry red wine
  • 1 (28-ounce) can crushed tomatoes
  • 1 (15-ounce) can petite diced tomatoes
  • 1 tsp sugar
  • ½ c chopped fresh basil leaves
  • 1 pound spaghetti

Preheat oven to 425 degrees F. Line a baking sheet with foil and lightly oil or coat with nonstick spray.

In a large bowl, combine Parmesan, Panko, parsley, milk, egg, shallot and garlic; season with 1 teaspoon salt and 1/2 teaspoon pepper. Let stand 10 minutes.

Using a wooden spoon or clean hands, add ground beef and ground pork, stirring until well combined. Roll the mixture into 1-to-1-1/2-inch meatballs, forming about 36 meatballs.

Place meatballs in a single layer onto the prepared baking sheet. Place into oven and bake until browned, about 12-15 minutes; set aside.

Heat olive oil in a large stockpot or Dutch oven over medium heat. Add onion, and cook, stirring frequently, until translucent, about 2-3 minutes. Stir in garlic, Italian seasoning, fennel seeds, and crushed red pepper flakes until fragrant, about 1 minute.

Stir in wine, scraping any browned bits from the bottom of the pot.

Stir in tomatoes and sugar; season with salt and pepper, to taste. Bring to a boil; reduce heat and simmer until sauce has thickened, about 20 minutes.

Stir in meatballs; cover and continue to simmer until flavors have blended, about 30 minutes. Stir in basil; season with salt and pepper, to taste.

In a large pot of boiling salted water, cook pasta according to package instructions; drain well.

Serve immediately, topped with meatballs and sauce.


Tuesday, November 19, 2024

Ground Chicken Lettuce Wraps

THESE have been my favorite lettuce wraps, but there's a new favorite in town.

The sauce for these were over the top delicious! The hoisin makes the sauce. It's a bit sweeter and a bit more savory, but the balance is perfect. 

These will be on the favorite list for this year for sure.


Ground Chicken Lettuce Wraps
Serves 4
  • 1 pound ground chicken
  • 1 tablespoon oil
  • 8 ounces water chestnuts diced
  • 1 small bell pepper diced
  • 3 cloves garlic minced
  • 1/2 inch ginger chopped
  • 1 small onion finely diced
  • 1/2 teaspoon salt
  • 1/4 teaspoon pepper
  • 1 head romaine 8 large leaves

LETTUCE WRAP SAUCE
  • 1/4 cup hoisin sauce
  • 1 1/2 tablespoons soy sauce
  • 1 tablespoon rice wine vinegar
  • 1/2 tablespoon sesame oil
  • 1/2 teaspoon cornstarch

In a small bowl, whisk together the hoisin sauce, soy sauce, rice wine vinegar, sesame oil, and cornstarch, until combined.

Heat the oil in a non-stick skillet and place over medium heat. Once hot, add the chicken, break it apart, and stir fry for 2-3 minutes until no longer pink.

Push the chicken to one side of the pan, add the chestnuts, bell pepper, garlic and onion and stir fry for several minutes.

Add the sauce and cook everything together for 1-2 minutes, until everything is evenly coated.

Place the filling in the lettuce cups and serve immediately.

Monday, November 18, 2024

Chicken Stew

Photo from Insanely
Good Recipes
I don't know why I've never thought to make a stew with chicken, but man was this awesome. I mean it was like the inside of a chicken pot pie, but bigger pieces. 

This was a solid recipe. I'd make this again for sure. I followed the recipe and didn't make any changes. Weird, I know. 

Chicken Stew
Serves 6
  • 2 lbs boneless, skinless chicken thighs, cut into 1-inch pieces
  • Salt and pepper to taste
  • 2 tablespoons olive oil
  • 1 large onion, diced
  • 3 carrots, sliced
  • 2 celery stalks, chopped
  • 3 garlic cloves, minced
  • 1/4 cup all-purpose flour
  • 4 cups low-sodium chicken broth
  • 1 cup dry white wine (optional)
  • 1 lb baby potatoes, halved
  • 2 bay leaves
  • 1 teaspoon dried thyme
  • 1/2 teaspoon dried rosemary
  • 1/2 cup heavy cream
  • 1 cup frozen peas
  • 1/4 cup fresh parsley, chopped

Season the chicken pieces with salt and pepper. Heat olive oil in a large Dutch oven over medium-high heat. Add the chicken and cook until browned on all sides, about 5-7 minutes. Remove the chicken and set aside.

In the same pot, add the onions, carrots, and celery. Cook until the vegetables begin to soften, about 5 minutes. Add the garlic and cook for another minute.

Sprinkle the flour over the vegetables and cook, stirring constantly, for 2 minutes.

Slowly pour in the chicken broth and wine (if using), stirring constantly to prevent lumps. Add the browned chicken, potatoes, bay leaves, thyme, and rosemary.

Bring to a boil, then reduce heat and simmer, partially covered, for about 30-35 minutes or until chicken is tender and potatoes are cooked through.

Stir in the heavy cream and peas. Simmer for an additional 5 minutes.

Remove the bay leaves, taste, and adjust the seasoning if needed. Stir in the fresh parsley just before serving.

Serve this hearty chicken stew with crusty bread for a complete and satisfying meal. Enjoy!

Sunday, November 17, 2024

Slow Cooker Beef and Barley Stew

Photo from Fake Ginger
You know I love a good slow cooker Sunday. I'm always game for a soup, stew, or something else in the slow cooker. Set it and forget it.

I wasn't a huge fan of this recipe. I think I should have browned the beef first. That adds so much flavor that I'm sad I didn't do it. 

The recipe was just ok. I think I like barley in soup better than a stew. I also didn't like using baby carrots. They have a very unique taste to me and it over powered the stew, in my opinion. 

Slow Cooker Beef and Barley Stew
Recipe from Fake Ginger
Serves 6
  • 1 ½ pounds chuck steak, cut into 1-inch pieces
  • 1 medium onion, diced
  • 2 cups baby carrots
  • 2 medium potatoes, diced
  • 2 cups water
  • 2 cups low-sodium beef broth
  • 1 (15 ounce) can tomato sauce
  • 2 teaspoon salt
  • ½ teaspoon dried oregano
  • ½ teaspoon paprika
  • ¼ teaspoon pepper
  • 2 cups frozen green beans
  • 2 cups frozen corn
  • ¾ cup medium pearl barley

Place chuck steak, onion, carrots, and potatoes in slow cooker

Add water, broth, tomato sauce, and seasonings

Cover and cook on low for 4 hours

Add green beans, corn, and barley

Cover and cook on low for 2 more hours or until barley and veggies are tender


Saturday, November 16, 2024

Beef Stew with Dumplings

Photo from I Am Homesteader
Dumplings. They are either a love or hate I think. The dumplings I grew up eating were more "dry" than wet and always on Hunter's Stew. 

I am not a fan of chicken and dumplings. Those dumplings are more "wet". Are you following what I mean? They are usually covered in a sauce. That's the part I'm not a fan of.

Now dumplings on top of something, like Hunter's stew is an entirely different love for me. this recipe has those types of dumplings. It never crossed my mind to put dumplings on top of stew. What an eye opener and Man was it good. 


Beef Stew with Dumplings
Recipe from I am Homesteader
Serves 8
  • 3 T extra-virgin olive oil
  • 1 ½ pounds chuck roast, cut into cubes
  • ¼ c all-purpose flour
  • 2 ribs celery, sliced (about ½ cup)
  • 3 large carrots, sliced into rounds (about ½ cup)
  • ½ c frozen peas
  • 5 Yukon gold potatoes, peeled, cut into bite-sized cubes (about 2 pounds)
  • 1 large yellow onion, chopped (about 1 cup)
  • 1 tsp garlic, minced
  • 2 bay leaves
  • ½ tsp fresh thyme leaves, chopped
  • ¼ c fresh parsley leaves, chopped
  • 2 T tomato paste
  • 1 tsp kosher salt
  • 1 tsp pepper
  • 3 c beef broth
  • ½ c red wine, we used cabernet

Dumplings
  • 1 c sour cream
  • ½ c whole milk
  • 2 large eggs, room temperature
  • 2 tsp fresh thyme leaves, chopped
  • 2 cups (250 g) all-purpose flour
  • 3 tsp baking powder
  • 1 tsp kosher salt
  • parsley, for garnish

In a large pot with a lid or Dutch oven over medium heat, add the oil.

Once hot, add the cubes of beef to the pot and brown them on all sides, about 10 minutes.

Sprinkle the flour over the beef cubes and stir to coat.

Add the celery, carrots, peas, potatoes, onions, garlic, bay leaves, thyme leaves, fresh parsley, tomato paste, salt, pepper, beef broth, and red wine to the pot. Stir to combine and bring the mixture to a boil.

Reduce the heat to low and let the stew simmer for about 1-1 ½ hours, or until the beef is tender.

When the stew has finished cooking, remove the bay leaves.

During the last few minutes of cooking the stew, make the dumplings.

Dumplings

In a large mixing bowl, whisk together the sour cream, milk, eggs, and fresh thyme.

In a separate bowl, whisk together the flour, baking powder, and salt.

Gradually add the flour mixture to the sour cream mixture, stirring until just combined.

Use a spoon to drop spoonfuls of the dumpling mixture into the stew. Cover the pot and let the dumplings cook for about 20-25 minutes, or until they are puffed and fully cooked.

Serve the stew hot, garnished with parsley.

Tuesday, November 12, 2024

Caesar-Marinated Chicken Kabobs

Everyone loves a good Caesar Salad, so I figured I might as well make Caesar chicken for a Caesar salad.

This recipe originally had zucchini to be cooked with the kebabs, but I opted for a salad instead. I'll cook the zucchini later. 

For the dressing, I thought 1 garlic clove wasn't enough and ended up putting in two relatively large cloves. My goodness was the dressing garlicky. I won't be kissing any vampires tonight.

Overall, store bought Caesar dressing, I think, is just fine. This dressing wasn't great, but just ok. 

Caesar-Marinated Chicken Kabobs
Recipe from Skinny Taste
Serves 4
  • 2 anchovy fillets, finely chopped
  • 1 small garlic clove, minced or grated
  • ⅓ c grated Parmigiano Reggiano
  • ¼ c fresh lemon juice
  • 5 T Greek Yogurt
  • 1 T extra-virgin olive oil, plus more if needed for the romaine
  • 1 ½ tsp Dijon mustard
  • ½ tsp freshly ground black pepper
  • 1 ¼ pounds skinless boneless chicken breast or thighs, cut into 1-inch cubes
  • 8 long wooden or metal skewers

To make the Caesar marinade

Add the anchovies, garlic and pepper to a large bowl and use your fork to mash into a paste.

Add the cheese, lemon juice, yogurt, 1 Tbsp olive oil, mustard, and pepper and stir to combine.

Reserve half for serving.

Add the diced chicken to the bowl with the remaining dressing and stir to coat.

Set aside to marinate at room temperature for 30 minutes or refrigerate overnight.

For the kabobs:

Trim the ends from the zucchini, halve it lengthwise, and cut it into semicircles between ½- and 1-inch thick.

Thread the chicken onto doubled skewers, for a total of 4 kabobs. Place the kabobs on a large plate or baking sheet and, when they’re assembled, season lightly with salt.

Preheat the grill with medium-high heat and oil the grates. Grill the kabobs for 6 to 8 minutes total, turning every 2 to 3 minutes, until the chicken is cooked through and well browned.

One-Pot Creamy Beef and Shells


I thought this was going to be like a bolognese. And it was in a way. What threw me off was adding paprika. It added a non-Bolognese flavor. Not my favorite.

All in all it was a good recipe. I didn't cook the pasta in the pot because, well, I never think the pasta cooks right. I'm weird I know it. 


One-Pot Creamy Beef and Shells
Recipe from Insanely Good Recipes
Serves 4
  • 1 tablespoon olive oil
  • 1 pound ground beef
  • 1 small onion, diced
  • 2 cloves garlic, minced
  • 1 teaspoon Italian seasoning
  • 1 teaspoon paprika
  • 1/2 teaspoon mustard powder
  • 1 teaspoon salt
  • 1/2 teaspoon black pepper
  • 2 tablespoons all-purpose flour
  • 2 1/2 cups beef broth
  • 1 (15-ounce) can tomato sauce
  • 8 ounces medium pasta shells, uncooked
  • 1/2 cup heavy cream, room temperature
  • 1 cup shredded cheddar cheese
  • Fresh parsley, chopped for garnish

In a large skillet, warm the olive oil over medium heat. Add the ground beef and cook, breaking it apart with a spatula, until no longer pink, about 5-7 minutes. Drain any excess fat (optional).

Add the diced onion and cook until soft, about 3 minutes. Then, stir in the minced garlic, Italian seasoning, paprika, mustard powder, salt, and pepper. Cook until fragrant.

Sprinkle the flour over the beef mixture, stir to combine, and cook for 2 minutes to remove the raw flour taste.

Gradually add the beef broth, followed by the tomato sauce, stirring continuously. Turn the heat to medium-high and bring the liquid to a boil.

Add the pasta, stir well, then add the lid and reduce the heat to medium. Let simmer for 10-12 minutes or until the pasta is tender. Stir every few minutes to keep the pasta from sticking.

When the pasta is cooked, add the heavy cream and stir. Top the dish with the cheese, cover with a lid, and leave to melt for 2-3 minutes.

Stir the cheese into the dish and serve with chopped fresh parsley. Enjoy!

Friday, November 8, 2024

Sabrina’s Steak Medallions

Photo from Dinner
Then Dessert
This recipe looks a little daunting. And it does have a lot of ingredients. I promise you it's worth it though. My goodness was it worth it. 

Pro tip #1: Get everything out and measured for this recipe. It makes it so much easier to have everything out so you won't forget something. 

No big surprise, but I grilled my steak instead of pan frying it. I don't think it made any difference really based on the pan I use. If you use a cast iron it may add some flavor. 

I'd make this again in a heart beat. I highly recommend it. 


Sabrina’s Steak Medallions
Serves 4
  • 2 pounds beef tenderloin , cut into 8-10 2-inch chunks
  • 1 teaspoon kosher salt
  • 1 teaspoon coarse ground black pepper
  • 3 tablespoons unsalted butter
  • 1 yellow onion ,thinly sliced
  • 8 ounces crimini mushrooms
Red Wine Sauce:
  • 3 tablespoons unsalted butter
  • 2 shallots , minced
  • 1 garlic clove , minced
  • 1/2 teaspoon kosher salt
  • 1/2 teaspoon dried oregano
  • 1/4 teaspoon coarse ground black pepper
  • 2 tablespoons tomato paste
  • 1 cup dry red wine
  • 1 cups beef broth

Season the steak medallions with salt and black pepper. Slice the onions and mushrooms into thin pieces with a sharp knife. Heat a cast iron skillet over high heat until hot.

Add the steaks to the hot skillet and cook for 3 minutes until browned on each side. Then, remove the steak from the pan and set it to the side.

Add butter, onions, and mushrooms to the pan. Then reduce heat to medium, stir, and cook for 4-5 minutes until the vegetables are softened.

Remove the vegetables from the pan and set them to the side with the steak.

Add unsalted butter, shallots, and garlic to the same pan and keep it over medium heat. Cook for 2-3 minutes, occasionally stirring until the shallots and garlic are translucent.

Add kosher salt, oregano, black pepper, and tomato paste to the pan and cook for another 30 seconds

Then add the red wine and beef broth. Bring the liquid ingredients to a boil, reduce the heat to medium, and cook at a simmer for 10-12 minutes.

Continue cooking until the red wine sauce is reduced by half.

Turn off the heat and add the onions and mushrooms to the sauce. Add the cooked Steak Medallions and stir to coat them in the sauce. Then, serve with extra sauce spooned over the top. Enjoy with mashed potatoes and other classic side dishes.

Season steaks all over with salt and pepper.

Heat cast iron skill on high heat.

Sear the steaks on each side for 3 minutes until browned.

Remove the steaks medallions, add in butter, onions and mushrooms.

Reduce heat to medium, stir and cook for 4-5 minutes until softened.

Remove vegetables from the pan and set aside with steak.

In a large skillet add unsalted butter, shallots, and garlic on medium heat.

Cook for 2-3 minutes, stirring occasionally, until translucent.

Whisk in salt, oregano, black pepper, and tomato paste and cook for 30 seconds.

Add wine and beef broth, bring to a boil, then reduce the heat to medium. 10-12 minutes until the sauce is reduced by about half.

Turn off heat, add in the onions and mushrooms and steak and stir to coat.

Serve over mashed potatoes.

Thursday, November 7, 2024

Hibachi Chicken

Oh man! This recipe was off the charts delicious. It's an excellent recipe if you have leftover rice. And if you're making rice for another recipe, make extra so you can make this recipe. 

I didn't change a single thing in this recipe. I did, however, only use one pan for the chicken, veggies and then rice. I just couldn't see dirtying another pan. I ended up mixing it ALL together in one big fried rice. So good. 

I'll make this again for sure.

Hibachi Chicken
Serves 4

For the Chicken:
  • 1.5 lbs boneless, skinless chicken breasts, cut into bite-sized pieces
  • 2 tablespoons butter, divided
  • 2 tablespoons sesame oil, divided
  • 3 cloves garlic, minced
  • 1/4 cup soy sauce
  • 1 tablespoon brown sugar
  • Juice of 1/2 lemon
  • Salt and pepper to taste

For the Vegetables:
  • 1 cup zucchini, sliced into half-moons
  • 1 cup mushrooms, sliced
  • 1 cup onion, sliced
  • 1 cup carrots, julienned
  • 1 tablespoon soy sauce
  • 1 tablespoon sesame oil
  • Salt and pepper to taste
For the Fried Rice:
  • 3 cups cooked white rice (preferably day-old)
  • 2 eggs, beaten
  • 1 cup frozen peas and carrots, thawed
  • 3 tablespoons soy sauce
  • 2 tablespoons sesame oil
  • 2 tablespoons butter
  • 3 cloves garlic, minced
  • 1/4 cup green onions, chopped
  • Salt and pepper to taste
Combine all the sauce ingredients in a bowl. Stir well until smooth and set aside. For best results, refrigerate for at least an hour before serving.

Heat a wok or large skillet over medium-high heat. Add 1 tablespoon of butter and 1 tablespoon of sesame oil. Allow the butter to melt and start to bubble.

Add the chicken pieces to the hot skillet. Season with salt and pepper. Cook, turning occasionally, until the chicken is browned on all sides and cooked through, about 5-8 minutes.

Reduce the heat to medium. Add the minced garlic and cook for about 30 seconds until fragrant. Then, add the soy sauce, brown sugar, and the remaining butter. Stir to coat the chicken evenly.

Squeeze the juice of half a lemon over the chicken and give it a final stir. Allow the mixture to simmer for about 2-3 minutes until the sauce thickens and coats the chicken.

In a separate skillet or the same wok after cooking the chicken, heat 1 tablespoon of sesame oil over medium-high heat. Add the zucchini, mushrooms, onion, and carrots. Season with salt and pepper. Stir-fry for about 5-7 minutes until the vegetables are tender but still crisp. Add 1 tablespoon of soy sauce and stir to coat the vegetables evenly. Cook for another 1-2 minutes.

In the same skillet or wok, push the vegetables to one side and add the beaten eggs. Scramble the eggs until fully cooked, then mix them with the vegetables. Add the cooked rice, thawed peas, and carrots to the skillet. Stir well to combine.

Add the soy sauce, sesame oil, and butter. Stir to coat the rice evenly. Cook for another 5-7 minutes, stirring occasionally, until the rice is heated through. Add the minced garlic and chopped green onions. Stir well and cook for an additional 2-3 minutes.

Wednesday, November 6, 2024

Queso Blanco White Queso Dip

I was on appetizer duty for book club this month. I found my small crock pot in the garage and thought I'd make queso. You need to keep it warm you know 

This was a great recipe. I didn't add the jalapenos because we have on book clubber who's not a fan of heat. It definitely would have been more flavorful. 

I could eat queso all day, and I'd make this one again.


Queso Blanco White Queso Dip
Recipe from Julie Blanner
Serves 8
  • ½ pound white American cheese cubed
  • ½ c heavy cream
  • ¼ c tomato chopped
  • ½ fresh jalapeno chopped

On the stovetop in a saucepan over medium-low heat, melt cheese and heavy cream until smooth. Or, place in your mini slow cooker on LOW for 1-2 hours.

Stir in tomato and jalapeno.

HOW TO STORE

Room Temperature – While you can leave this queso blanco out at room temperature for up to two hours, it won’t stay warm, smooth and creamy unless it’s heated in a crockpot or on the stove!

Refrigerator – Store the white queso dip refrigerated in an airtight container for up to 4 days. Gently reheat in the microwave or on the stovetop and add more milk, if needed, to thin the queso blanco dip.

Monday, November 4, 2024

Marry Me Chicken Soup

Photo credit to Insanely
Good Recipes
Another favorite being added to the list for 2024! This soup was fan-freakin-tastic.

What I did:
  • I actually measured everything out. I didn't eye ball anything and the seasoning was spot on

What I didn't do:
  • I don't care for sundried tomatoes, so I swapped those out for fire roasted diced tomatoes.
  • Didn't add the spinach because cooked spinach is icky
  • Forgot to add the lemon juice in the end, and I still loved the recipe so unsure it was necessary. 
  • Instead of adding the parmesan cheese to the soup, I added it on top of my bowl. 

Bottom line, if you're looking for an easy, creamy soup for the winter, this is the soup for you. 


Marry Me Chicken Soup
Serves 4
  • 4 boneless, skinless chicken thighs (or chicken breasts)
  • 2 tbsp olive oil
  • 1 tbsp unsalted butter
  • 1 medium onion, finely chopped
  • 4 garlic cloves, minced
  • 2 carrots, peeled and diced
  • 2 celery stalks, diced
  • 1 tsp dried thyme
  • 1 tsp dried oregano
  • 1 tsp red pepper flakes (optional for a bit of heat)
  • 4 cups chicken broth
  • 1 cup heavy cream
  • 1/2 cup grated Parmesan cheese
  • 1 cup sun-dried tomatoes (drained and chopped)
  • 1 tbsp fresh rosemary, chopped
  • 1 tbsp fresh basil, chopped
  • Salt and pepper, to taste
  • 1 cup baby spinach
  • 1/4 cup fresh parsley, chopped (for garnish)
  • Juice of half a lemon

Season the chicken with salt and pepper on both sides. Heat the olive oil and butter in a large pot or Dutch oven over medium heat. Add the chicken thighs (or breasts) and sear for about 5 minutes per side until browned. Remove from the pot and set aside.

In the same pot, add the chopped onion, carrots, and celery. Cook until the vegetables are softened, about 5-7 minutes. Stir in the garlic, thyme, oregano, and red pepper flakes. Cook for another minute until fragrant.

Pour in the chicken broth and add the chopped sun-dried tomatoes. Stir well to combine. Return the chicken to the pot, cover, and let it simmer for about 20-25 minutes until the chicken is fully cooked and tender.

Remove the chicken from the pot and use two forks to shred it into bite-sized pieces. Return the shredded chicken to the pot.

Stir in the heavy cream, grated Parmesan cheese, rosemary, and basil. Let it simmer for 5-10 minutes, allowing the flavors to meld. Add the baby spinach and stir until wilted.

Squeeze in the lemon juice for a fresh burst of flavor. Taste and adjust the seasoning with more salt, pepper, or red pepper flakes if needed.

Ladle the soup into bowls and garnish with freshly chopped parsley. Serve with crusty bread for dipping. Enjoy!

Sunday, November 3, 2024

Sabrina's Carne Picada

Carna picada was a staple in the house when I lived with a Mexican family in Guadalajara in 1990. It
was my favorite meal she made. We ate it mostly with rice, then used the rest as leftovers in tacos the following days. I always knew it was picada day because you could smell it from down the street. 
Photo from Dinner
Then Dessert

It's a surprisingly easy recipe to make that results in mouthwatering flavors. The ingredients for this recipe most have in their home. You may have to actually buy the beef, but the rest we all usually have in the pantry. 

I've made carne picada before and claimed it a favorite. The one I made from Hola Jalapeno is still my favorite. 

This recipe was delicious though. My only "complaint" and I say that mildly, is that the chili powder is too strong of a flavor. I love chili powder, but like it to be just a hint and not a main flavor. It didn't stop me from eating this and loving it though. 


Sabrina's Carne Picada
Serves 6
  • 3 pounds bottom round roast
  • 1/4 cup flour
  • 2 tablespoons chili powder
  • 1 tablespoon kosher salt
  • 2 teaspoons coarse ground black pepper
  • 1 teaspoon cumin
  • 29 ounces diced tomatoes
  • 4 ounces diced green chilies
  • 1 teaspoon sugar

Cut the beef roast into 1/2-inch cubes.

Mix the flour, chili powder, salt, black pepper, and cumin. Toss the meat with the flour and spice mixture.

Add vegetable oil to a large dutch oven on high heat. Add the beef in batches and brown, about 4-5 minutes per batch.

Add tomatoes, green chilis, and sugar to the pot with the beef. Stir to mix, cover and simmer on low heat for 90 minutes.

Serve in tacos, burritos, or over rice in burrito bowls.

Easy Banana Chocolate Chip Muffins

I've been on a bit of a banana kick lately. Once I discovered I could eat bananas while having the big D, they just have to be more green than ripe, I was all in with bananas. Which is weird, because prior to being diagnosed with the Big D I wasn't a banana person. 

The problem with bananas that at a certain point they become too ripe and thus too much sugar in them. So instead of tossing them, I try to make some low carb muffins or something. Still sugar, but in my brain less banana per muffin I guess. 

So this recipe made a good muffin. I swapped chocolate chips out for sugar free chips and sugar alternative. While this recipe still uses flour, I thought swapping out the other sugars will make them at least a little healthier. 


Easy Banana Chocolate Chip Muffins
Makes 12
  • 1 1/2 cups all-purpose flour
  • 1 teaspoon baking powder
  • 1 teaspoon baking soda
  • 1/2 teaspoon salt
  • 3 large ripe bananas, mashed
  • 3/4 cup granulated sugar
  • 1 egg, lightly beaten
  • 1/3 cup butter, melted
  • 1/2 tsp vanilla extract
  • 3/4 cup chocolate chips

Preheat the oven to 350 degrees Fahrenheit and grease the muffin tins with cooking spray.

Whisk the flour, baking soda, baking powder, and salt in a medium mixing bowl. Then, set it aside.

Mix the mashed bananas, sugar, egg, butter, and vanilla in a separate bowl until just combined. Do not over-mix.

Slowly incorporate the dry ingredients using a spatula until combined. Fold in the chocolate chips.

Pour the batter into a prepared muffin tin until each muffin is 3/4 full.

Bake them in the oven for 25 to 30 minutes, or until a toothpick comes out clean.

Transfer them to a wire rack to cool for at least 10 minutes. Enjoy!

Saturday, November 2, 2024

Beef Taquitos

Beef taquitos are not something I eat very much of. I mean, they're just small tacos rolled up and then fried. I'm surprised I haven't eaten them more. 

These are super easy to make and ever so delicious. I baked mine in the oven, but next time I'm doing it in the air fryer.

Beef Taquitos
Serves 6
  • 1/2 tablespoon avocado oil or olive oil
  • 1/4 medium onion, diced
  • 1 pound ground beef
  • Taco Seasoning use the entire recipe of our homemade taco seasoning*
  • 1/4 cup water
  • 20 corn tortillas
  • 1 1/2 cups shredded Mexican blend cheese or cheddar cheese
  • Oil, if you are frying the taquitos
  • Toppings: shredded lettuce, diced tomatoes, sour cream, salsa, and guacamole
  • beef

In a large skillet, heat the oil over medium high heat. Add the onion and cook until tender, about 3 minutes. Add the ground beef and brown for about 5 minutes, breaking up the meat into small pieces using a wooden spoon. Cook until meat is no longer pink. Drain off any excess grease.

Add the taco seasoning and water; stir to combine. Simmer until thickened, about 3 minutes. Remove from heat and drain off any excess liquid. Set aside.

Wrap the tortillas in a damp paper towel and place on a plate. Microwave for 1 minute, flipping halfway through, or until tortillas are pliable. Remove from the microwave and keep covered while you assemble the taquitos.

Lay out one tortilla at a time on a flat surface. Place a heaping tablespoon of ground beef in the center of the tortillas. Top with about a tablespoon of shredded cheese. Tightly roll up each tortilla tightly. You can use toothpicks to make sure they stay securely rolled up. Continue assembling taquitos.

To bake the taquitos: Preheat oven to 425 degrees F. Line a large baking sheet with parchment paper. Place the taquitos in a single layer on the pan, seam side down, making sure they are not touching. Spray the tops of the taquitos with cooking oil or brush with avocado oil. Bake for 15-20minutes or until crispy and golden brown.

To fry the taquitos: Pour the oil into the bottom of a deep skillet, about 2-inches deep. Heat over medium-high heat until the oil is shimmering hot, it should be at 350 degrees F. Once hot, add 3 to 4 taquitos, seam side down, and fry until crisp and golden brown, about 3 to 5 minutes. Use tongs to rotate the taquitos during cooking to make sure they get crisp on all sides.

To use the air fryer: Preheat air fryer to 400 degreesF. Place the taquitos in a single layer in the basket, seam side down. You will have to cook in batches. Spray the taquitos with cooking spray, air fry for 5 minutes, flip and spray again, then air fry for 2 more minutes or until crispy. Transfer to a plate and repeat with remaining taquitos.

Transfer to a baking sheet or tray that has been lined with paper towels. Repeat with remaining taquitos, adjusting the temperature of the oil, if necessary.

If you used toothpicks, remove, and serve with desired toppings.

Friday, November 1, 2024

Hoisin Chicken with Cucumber Salad

I like hoisin. I like chicken. And I like all these ingredients. Oddly, I didn't like them together. 

The jalapeno overpowered the rest of the flavors. I'd only add one jalapenos

The cucumber salad on the side was the winner for me in this recipe. I'll be making that again.


Hoisin Chicken with Cucumber Salad
Recipe from Food Network
Serves 4

For the Chicken:
  • 3/4 c hoisin sauce
  • 3 scallions, coarsely chopped
  • 5 cloves garlic
  • 1 2 -inch piece fresh ginger, sliced
  • 1 jalapeno pepper, stemmed and halved (remove seeds for less heat)
  • Zest and juice of 2 limes, plus lime wedges for garnish
  • 2 T rice vinegar
  • Kosher salt and freshly ground pepper
  • 2 pounds skin-on chicken thighs and drumsticks (separate pieces)

For the Salad:
  • 1/2 c rice vinegar
  • 2 T sugar
  • Kosher salt
  • 1 seedless cucumber, thinly sliced
  • 1/2 red onion, thinly sliced

Prepare the chicken: Preheat a grill to medium on one side. Combine the hoisin sauce, scallions, garlic, ginger, jalapeno, lime zest and juice, vinegar, and salt and pepper to taste in a mini food processor or blender; process until almost smooth. Season the chicken with salt; toss with the hoisin mixture in a large bowl.

Make the salad: Bring the vinegar, sugar and 1 1/2 teaspoons salt to a boil in a small saucepan, stirring. Remove from the heat; stir in 1/4 cup ice cubes until melted. Toss the cucumber and red onion in a serving bowl with the vinegar mixture; place in the refrigerator.

Grill the chicken over direct heat until the skin is crisp, 5 minutes per side, basting with extra marinade. Transfer to the cooler side of the grill; cover and grill until cooked through, 10 to 15 more minutes. Serve with the cucumber salad and lime wedges.